
Light Controlled Gene Expression Using pDusk and pDawn
Introduction
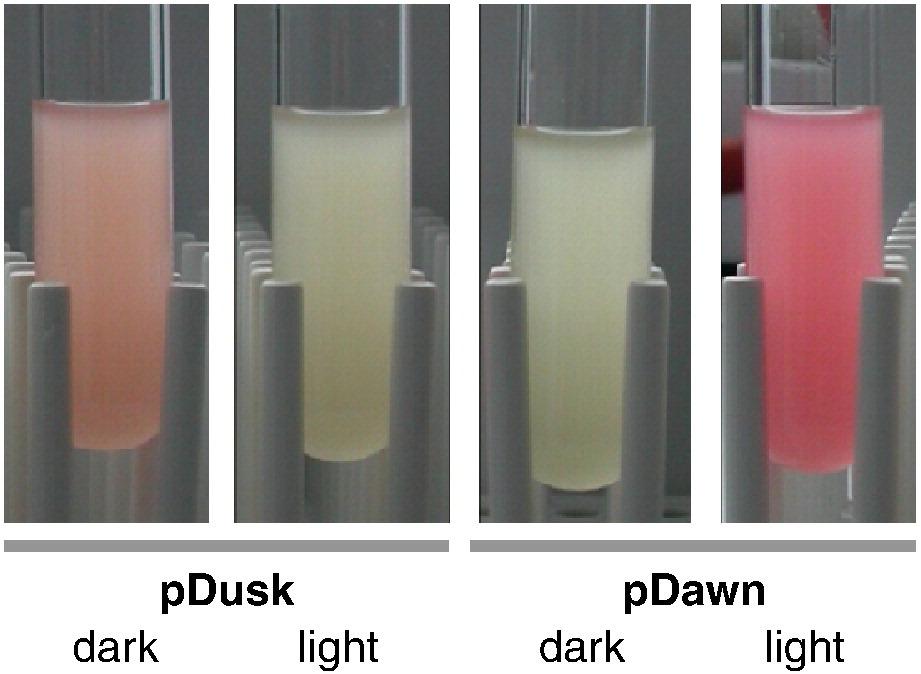
The pDusk and pDawn plasmids are engineered DNA systems that allow someone to control gene expression using light. Both pDusk and pDawn make Red Fluorescent Protein (RFP), which makes the colonies reddish in color. The difference is that pDawn turns on the RFP gene when exposed to light, while pDusk will only make RFP when kept in the dark. The pDawn system allows you to control the expression of RFP in the light. This kit teaches you many basic molecular biology techniques, while also giving you the ability to perform cool experiments using light to control gene expression.
The pDusk and pDawn systems are activated by blue light but since most white light contains blue light any sort of ambient light should work.
Timeline
Preparation
- 1 hour Make plates (set aside more time if it's your first time making plates)
- streak out bacteria onto an LB Agar plate (takes ~1 min)
- 12-18 hours Let the bacteria grow (easiest to just let it sit overnight)

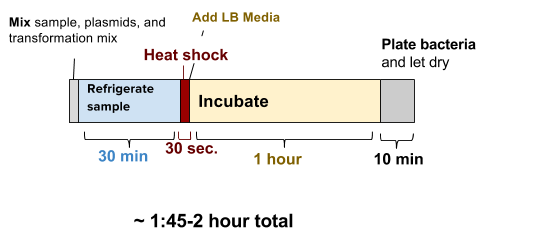
Day of experiment overview
- Mix bacteria together with the plasmids, and transformation mix (takes ~5 min)
- 30 min refrigerate sample solution (do NOT freeze)
- 30 seconds ‘heat shock’ the sample warm (42ºC/108ºF) water.
- Add LB media to your cell solution (takes ~1 min)
- 1 hour incubate for 1 hour, (or if @ room temp, incubate for 3 hour)
- 10 min Plate 100uL of the bacteria solution and let dry for 10 minutes
Incubate and wait for growth
- ~24 hours Incubate the plate at 37ºC (99ºF) for 16-24 hours or room temperature for 24-48 hours.

Protocols
Making Plates (~1 hour, but leave more time if it’s your first time)
Step by step walk-through of making plates with photos at: https://goo.gl/7yzpA1
Agar plates provide a solid media nutrient source for bacteria to grow on. The standard media that is used is LB (Luria Broth, Lysogeny Broth, or Luria Bertani Broth). This contains a carbon source, a nitrogen source, and salt (many strains of bacteria like salt!).
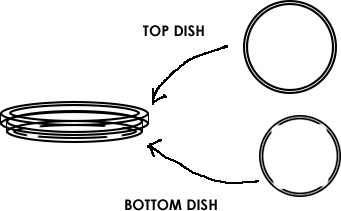
The top of the plate is the larger part.
- Find the tube labelled “LB Agar Media” dump its contents into the 250mL glass bottle. (You will need to make plates out of each kind of media. Rinse bottle between media.)
- Using the 50mL conical tube labelled “Tube for Measuring”, measure and add 150mL of water to the glass bottle.
- Making agar is like making jello-- heat the agar to dissolve it, then it will solidify when it cools. Heat the bottle in the microwave for 30 seconds at a time, being careful not to let the bottle boil over. DO NOT SCREW THE LID DOWN TIGHT! (just place it on top and give it a slight turn).
- The media is completely dissolved when the liquid looks yellow. This should take about 2 -3 minutes total of microwaving. Take the bottle out,(caution contents hot), and let it cool until you are able to touch it without much discomfort. This will take 20-30 minutes.
- While the bottle remains somewhat warm, pour the plates. One at a time, remove the lid of 7 plates and pour just enough of the LB agar from the bottle to cover the bottom half of the plate. Put the lid back on.
- Let cool for 1 hour and then store in your fridge at 4ºC, do not freeze

Making Competent Bacterial Cells for Transformation
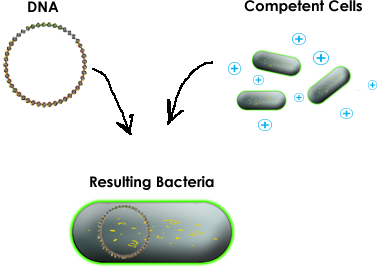
‘Competent’ means the bacterial cells are able to intake foreign DNA. The cells’ walls normally prevent things from entering, but mixing the bacteria with chemicals and salts that change the cells’ walls, allow the cells take up DNA from the environment. This process is called a ‘transformation’. We put all thecomponents into synthetic DNA to trick the bacteria into thinking that our DNA is its own DNA, so they make the RFP.
The bacterial transformation mix contains:
10% Polyethylene Glycol(PEG) 8000
PEG 8000 is thought to play several different roles in transformation, though nobody really knows for certain. Since both DNA and cell walls are negatively charged, they reject each other. PEG 8000 is thought to function by shielding the charge of the DNA, thereby making it easier to permeate the cell wall. PEG 8000 is also thought to help transport the DNA into the cell, as well as make the cell membrane itself more porous.
5% Dimethyl Sulfoxide (DMSO)
DMSO is sometimes used to treat ailments in humans. In a transformation it is thought to permeabilize the cell wall. Also, sometimes DNA folds into complex structures that make it more difficult to pass through the cell wall. DMSO also might help to break these DNA structures down.
25mM Calcium Chloride(CaCl2)
Similarly to PEG 8000, CaCl2 is thought to shield and neutralize the negative charge of DNA, thereby making it more likely to enter into the cell.
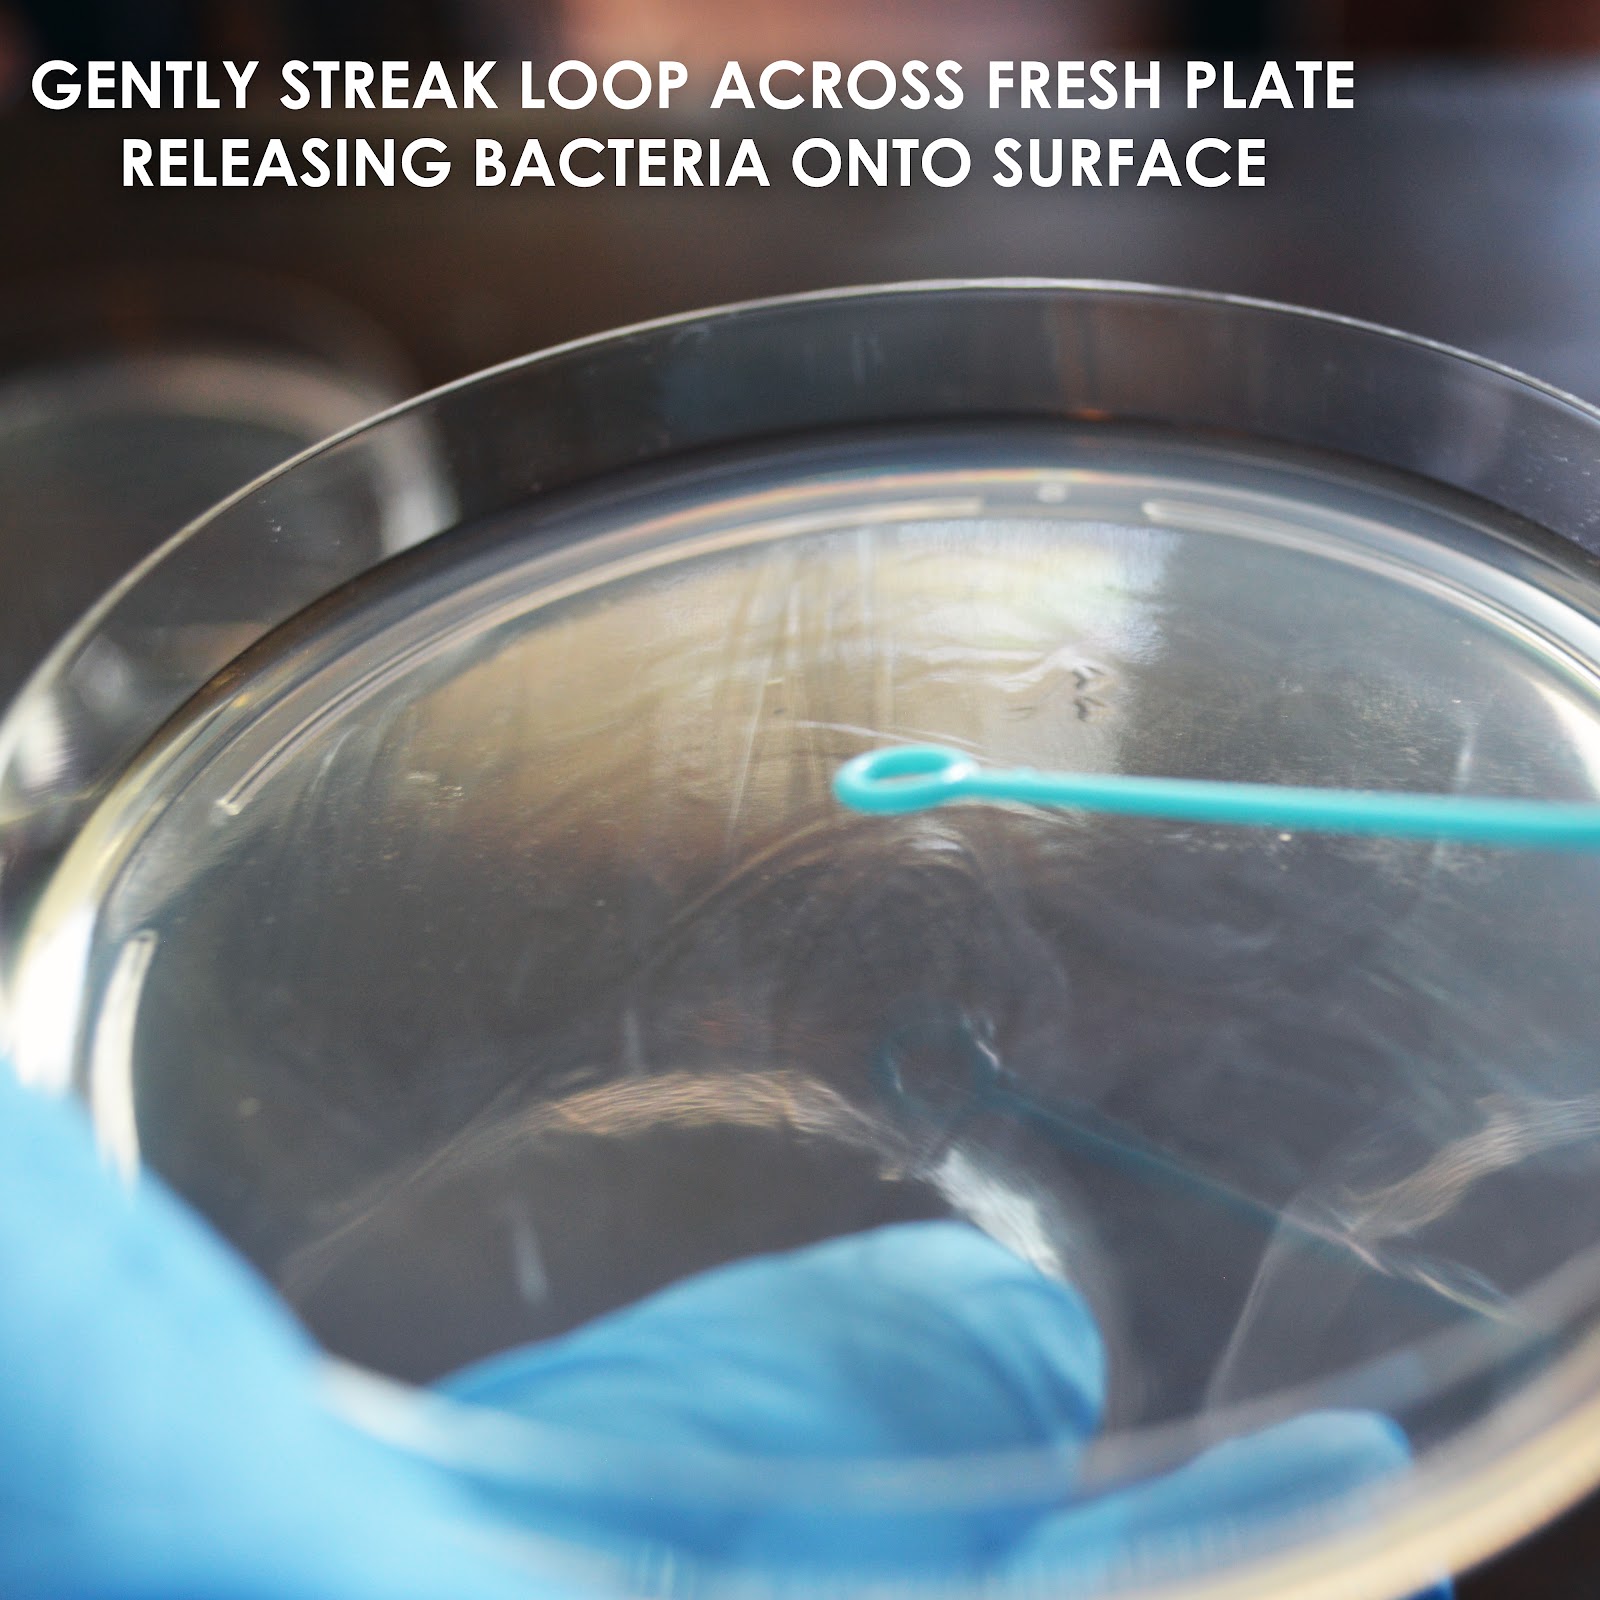
- Take one of the tubes of dried E. coli BL21, add water to the top and shake till it is all dissolved. Next, using your pipette put 100uL of the bacteria solution onto a new LB plate you made and using an inoculation loop gently spread or “streak” the bacteria. Let the plate grow overnight ~12-18 hours, or until you see white-ish bacteria begin to grow. Make sure you are using the LB agar plate, NOT the LB Kan agar plate. See the following link for a walk-through of how to streak out bacteria: https://goo.gl/GR8IOf
- Use a syringe to transfer 0.1 mL of Transformation mix to a microcentrifuge tube with pDawn.Make sure you mix the transformation mix with the tiny droplet of pDawn DNA in the microcentrifuge tube. Repeat with with pDusk DNA using another syringe. (Syringes can be washed with soap and water for reuse!!)
- Using an inoculation loop, gently scrape an area of the size of a pencil eraser of bacteria off of your fresh plate and mix it into the transformation pDawn mix. Mix until any big clumps have disappeared. Twirling the inoculation loop can work, but avoid making bubbles. Repeat with pDusk using a clean inoculation loop.
- Incubate this tube in the fridge (DO NOT FREEZE) for 30 minutes.
- Make a warm water bath for the next step. The water should be 42ºC (108ºF) water. You can approximate this temperature by using water that is warm, but comfortable enough such that you can still keep you hand in it.
- Incubate the tube for 30 seconds in 42ºC (108ºF) water.
- Add 1.5 mL of room temperature water (or fill to the top) to one of the LB media microcentrifuge tubes and shake to dissolve the LB.
- Using a clean syringe, add 0.5 mL of LB media to your competent cell mixture containing your DNA.
- Incubate the tube at 37ºC (99ºF) for 2 hour or 4 hours at room temperature. This step allows to bacteria to recover and replicate the DNA and perform the engineering process. Take an LB/Kan plate out of the fridge and bring them to room temperature
- Pour half of the LB/competent cell mix to your LB/Kan plates and gently spread the bacteria around the plate with an inoculation loop. Let dry for 10 minutes before putting the lid back on.
- Flip the plate upside down to prevent condensation from forming and dripping onto your bacteria.
- Incubate the plate at room temperature for 24-48 hours. Keep pDusk in a dark place or wrapthe plate with tin foil.
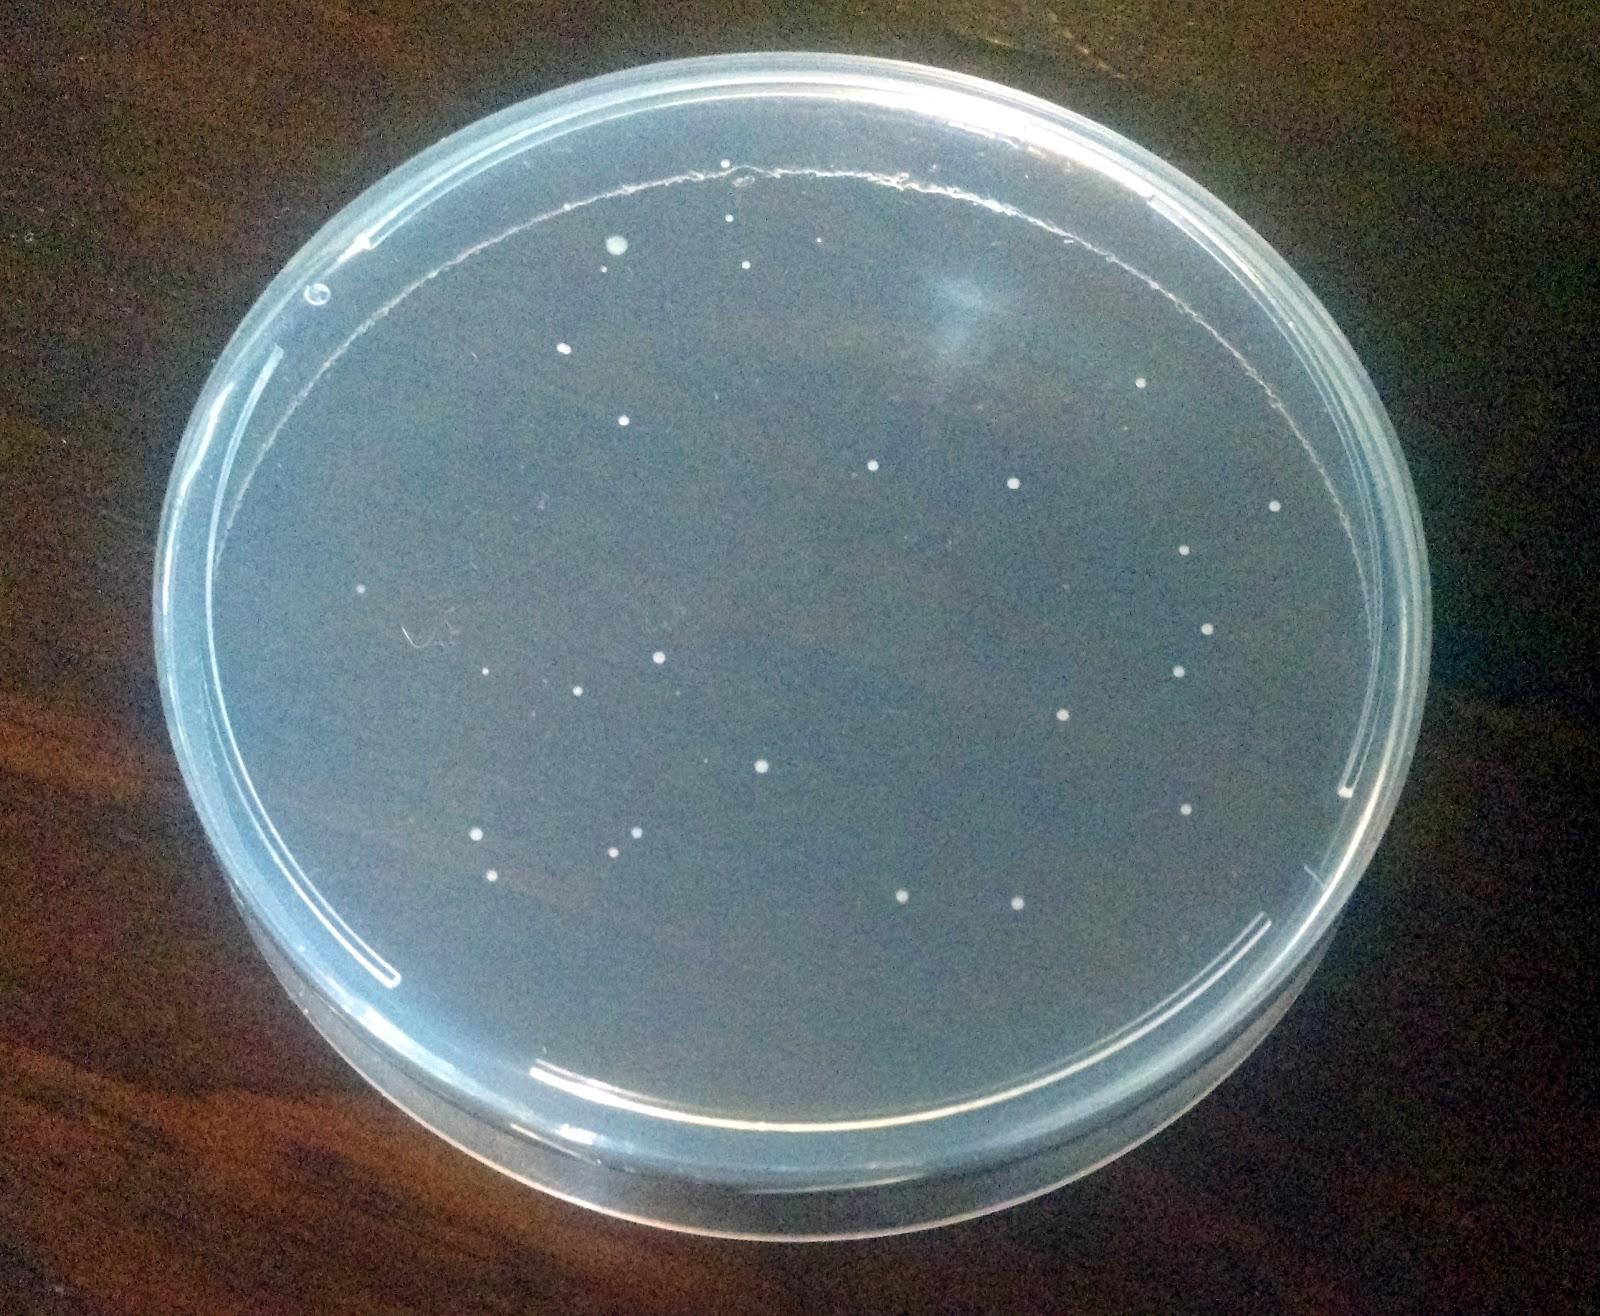
- If your transformation was successful, you should have a plate that looks like the one below. If you kept it in the dark the pDusk plate should look a little red. If you kept it in the light the pDawn plate should look red. If not, give it another shot, Science doesn’t always work on the first try. Also, feel free to contact us at odin@the-odin.com and we will help you troubleshoot.
Next Steps:
Now that you have colonies growing, you can do a couple of tests to see how pDusk and pDawn behave differently in light and in dark conditions.
- First find an isolated colony from your pDawn transformation. Using an inoculation loop, gently remove one of those colonies and streak it on a “LB/Kan Agar Media” plate you labeled “pDawn.” At the same time streak an isolated colony from your pDusk plate to a “LB/Kan Agar Media” plate you labeled “pDusk.”
- Keep both plates in ambient light and check for growth in 8-12 hours.
- Put on the yellow-lensed glasses and shine the blue light on the plates to compare your pDusk and pDawn plates. Which plate should be producing RFP when grown in lighted conditions?
- Repeat the experiment by streaking a new colony from you pDawn and pDusk plates. This time, keep them isolated from the light by wrapping the plates in tin foil.
- Allow the plates to grow in the dark for 8-12 hours and use the yellow glasses and blue light to compare the plates. Are your observations different than when you let the plates grow in the light?