
Making gel is a simple process often likened to making Jello. These gels are made with wells so a DNA solution can be suspended and segregated using the process of electrophoresis.
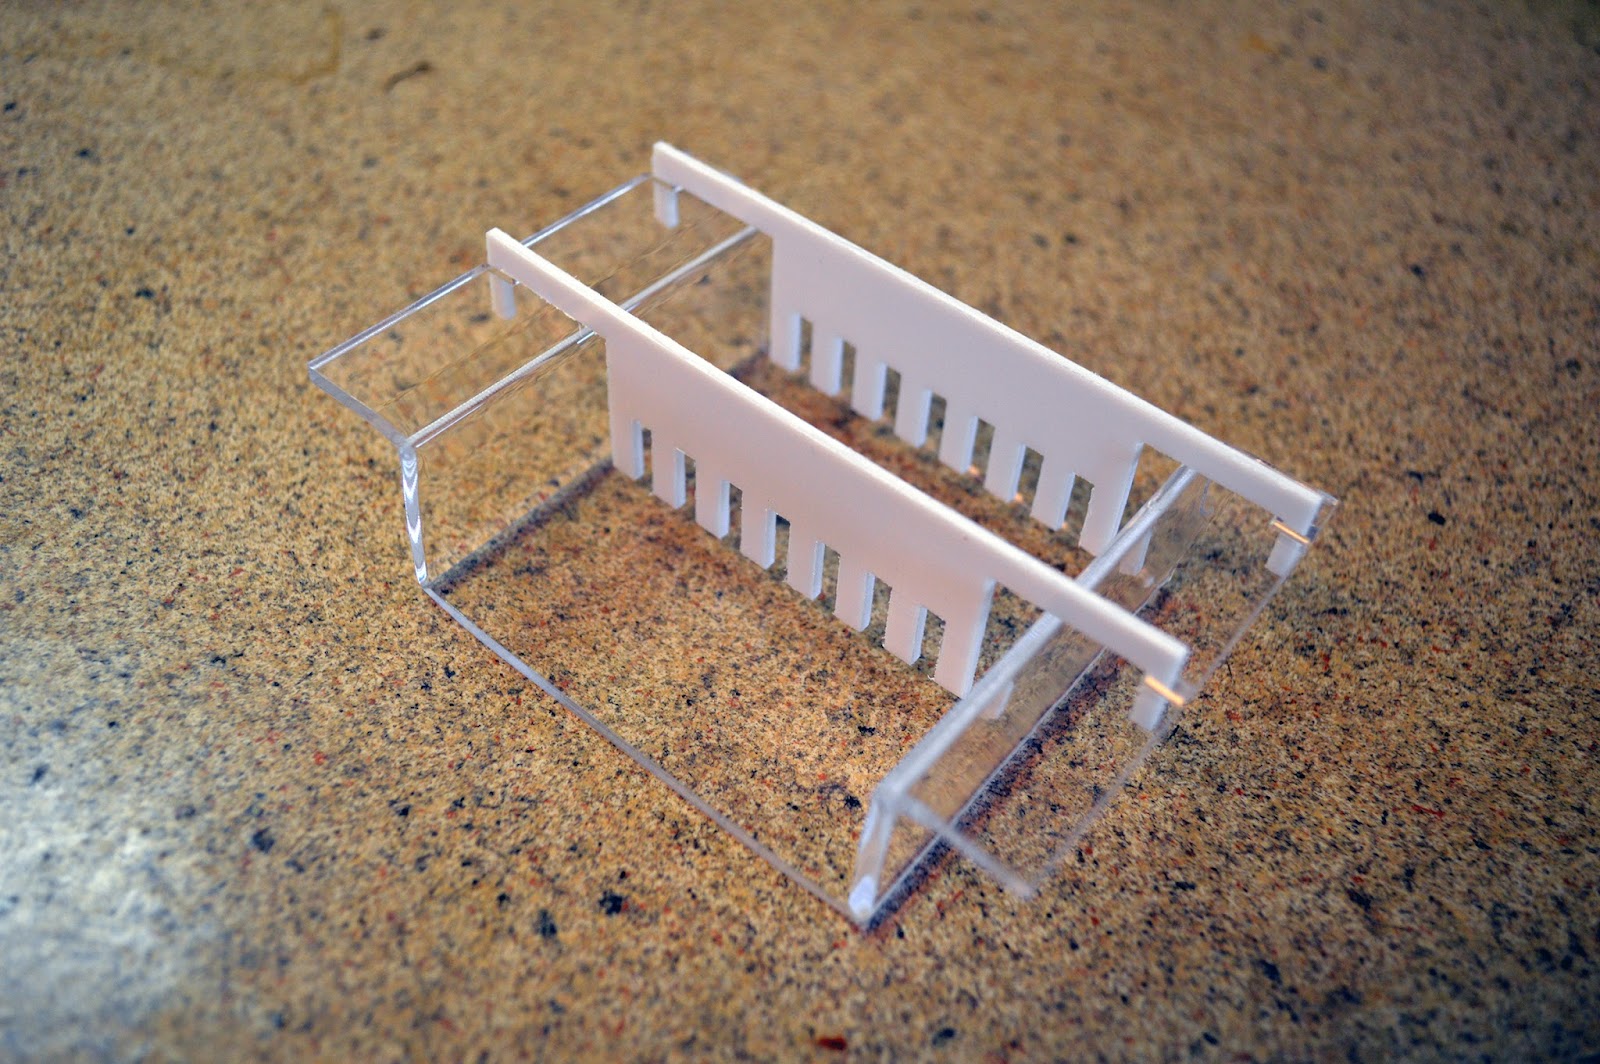
We start with the tray that comes with the kit. It has 2 combs.
Step 1:
Make an enclosed space to pour hot liquid in.
- Tear a piece of tape about 12’’ in length, duct tape works great.
- Wrap tape around exterior of tray leaving enough extra to fold over and stick around the bottom.
- Make sure the tape is sealed tightly against the ends. Rub the tape against to prevent leakage
Step 2:
Mix the Agarose
- The mixture calls for 1% Agarose Powder in TAE buffer.
- This tray holds about 40 mL at the correct levels.
- Correct mixture would be 40mL TAE to 0.4g Agarose powder
- Microwave at short seconds intervals with swishing in between until mix is fully dissolved. Hold the mixture up to the light to make sure all granules are completely dissolved. Be careful not to boil over!
Step 3:
Pour your fluid and let cool to make gel
*Add 4uL of DNA Safe Gel Stain after microwaving and mix it into fluid*
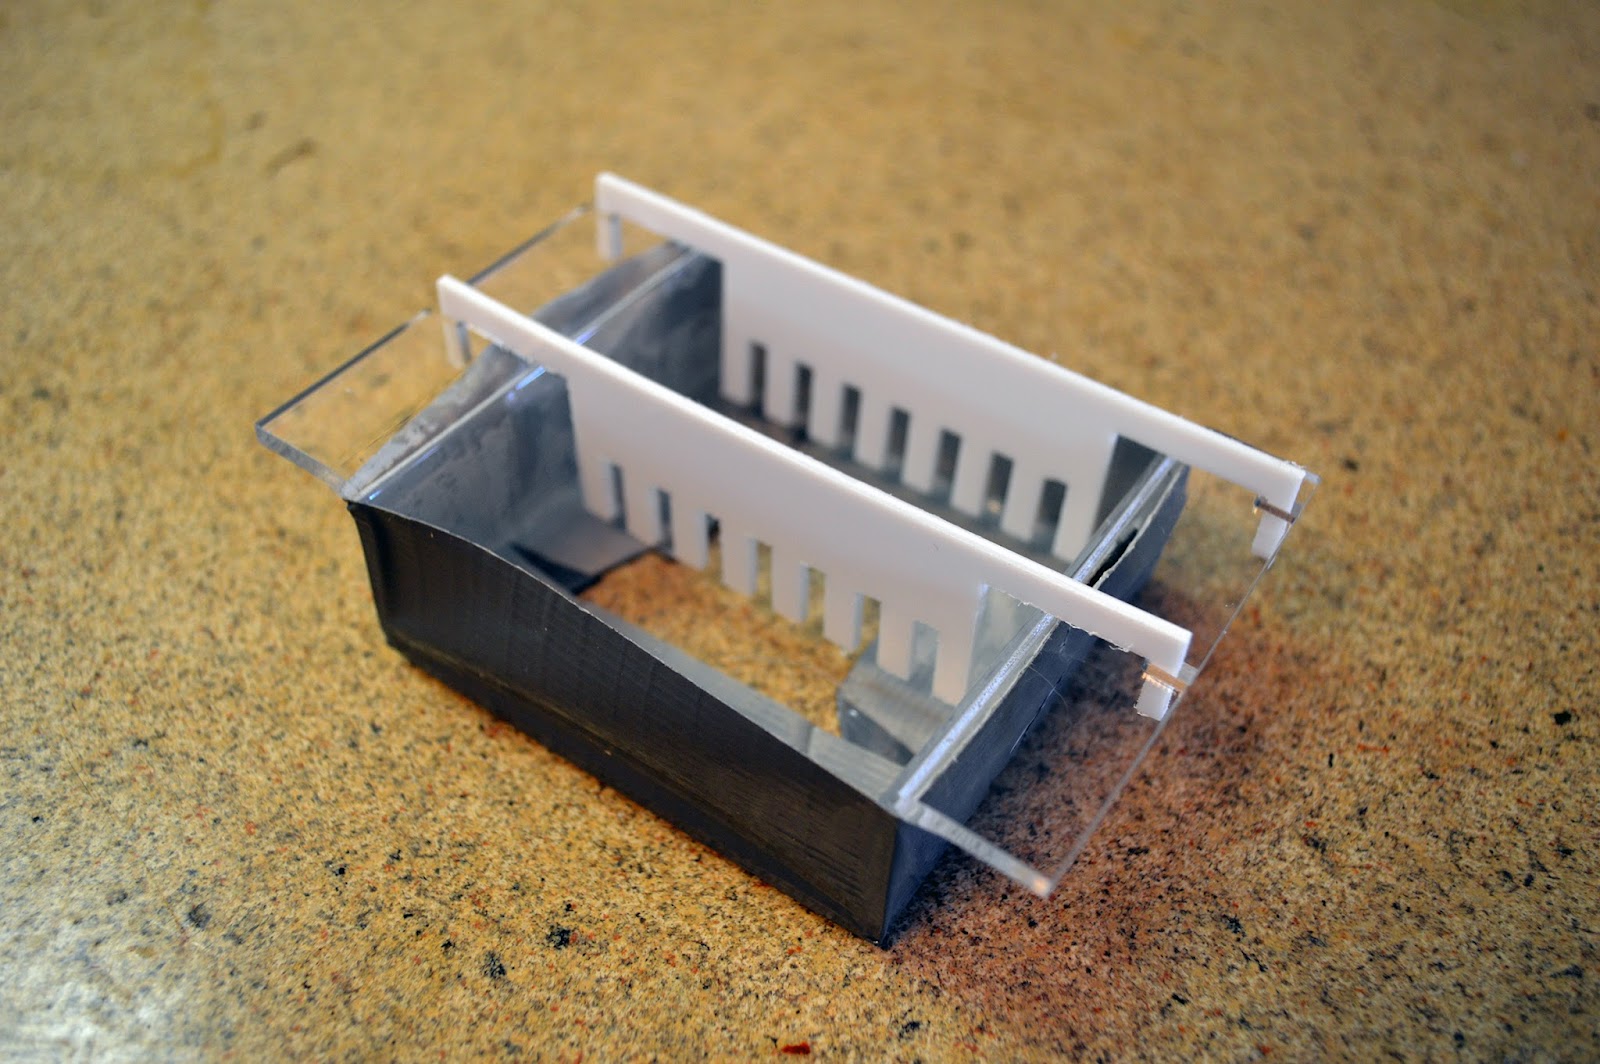
- Pour microwaved contents into tray with 1 or two combs resting balanced and in position.
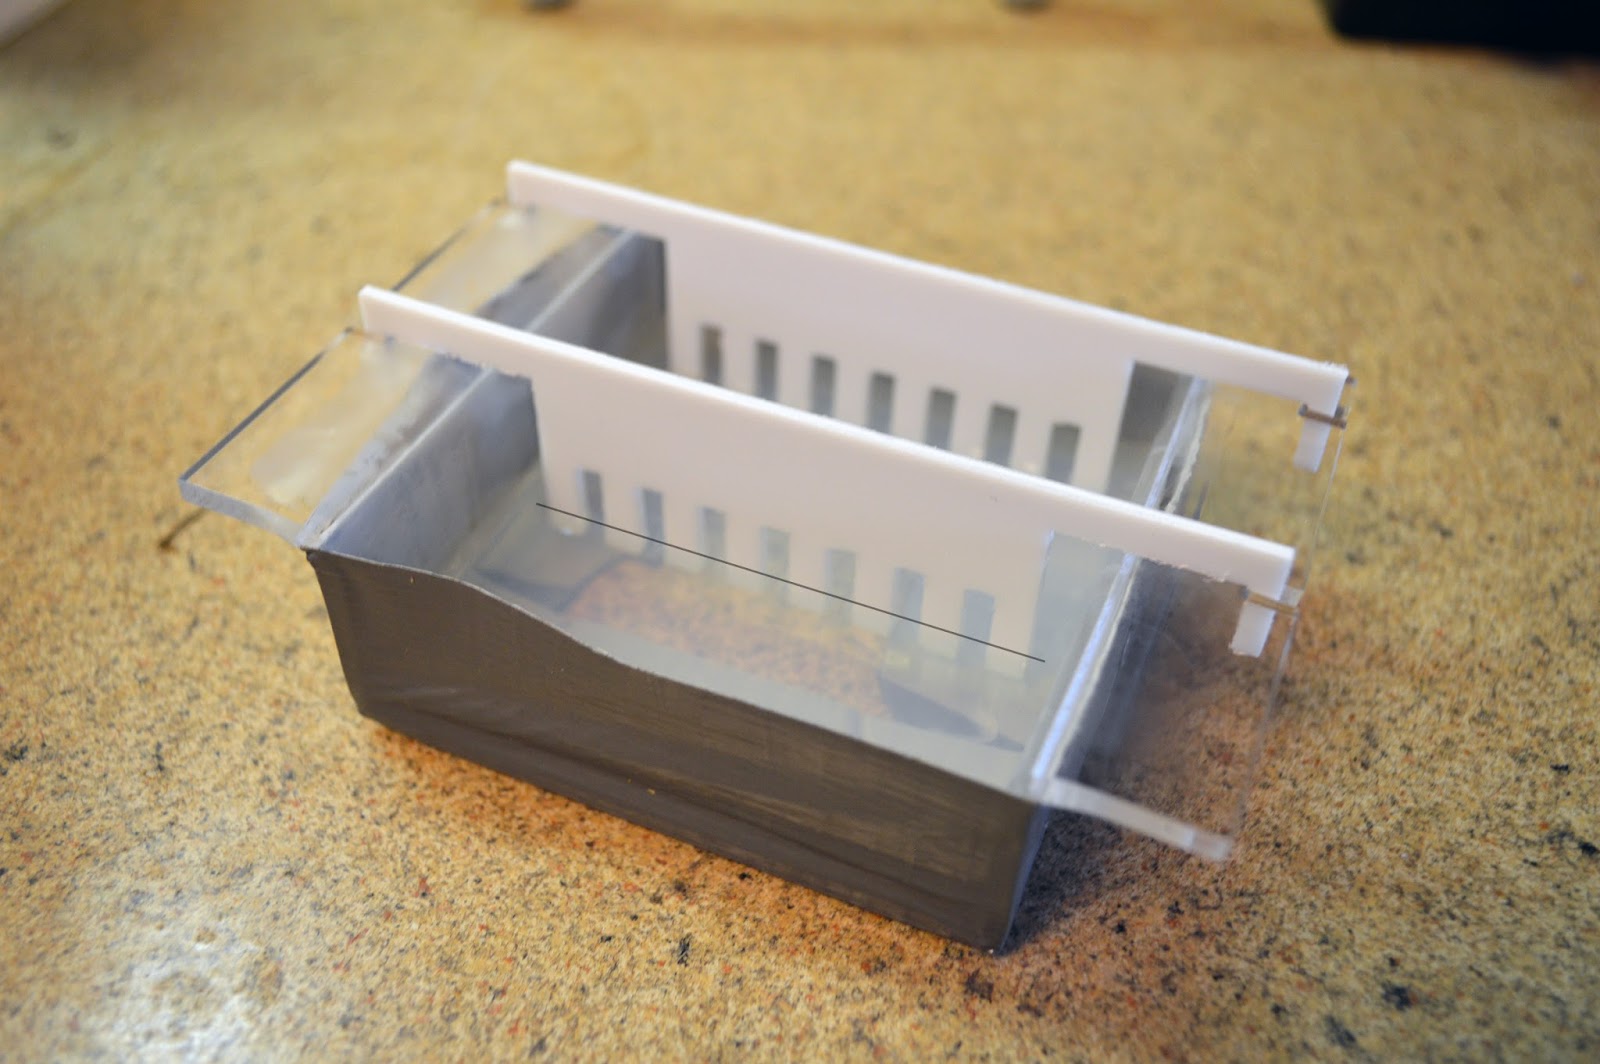
- The fluid should reach a level shown by the diagonal line in the photo.
- Place tray with fluid in fridge or leave out to air cool.
- Wait until gel has fully cured before use. The gel will be slightly opaque when cured completely.
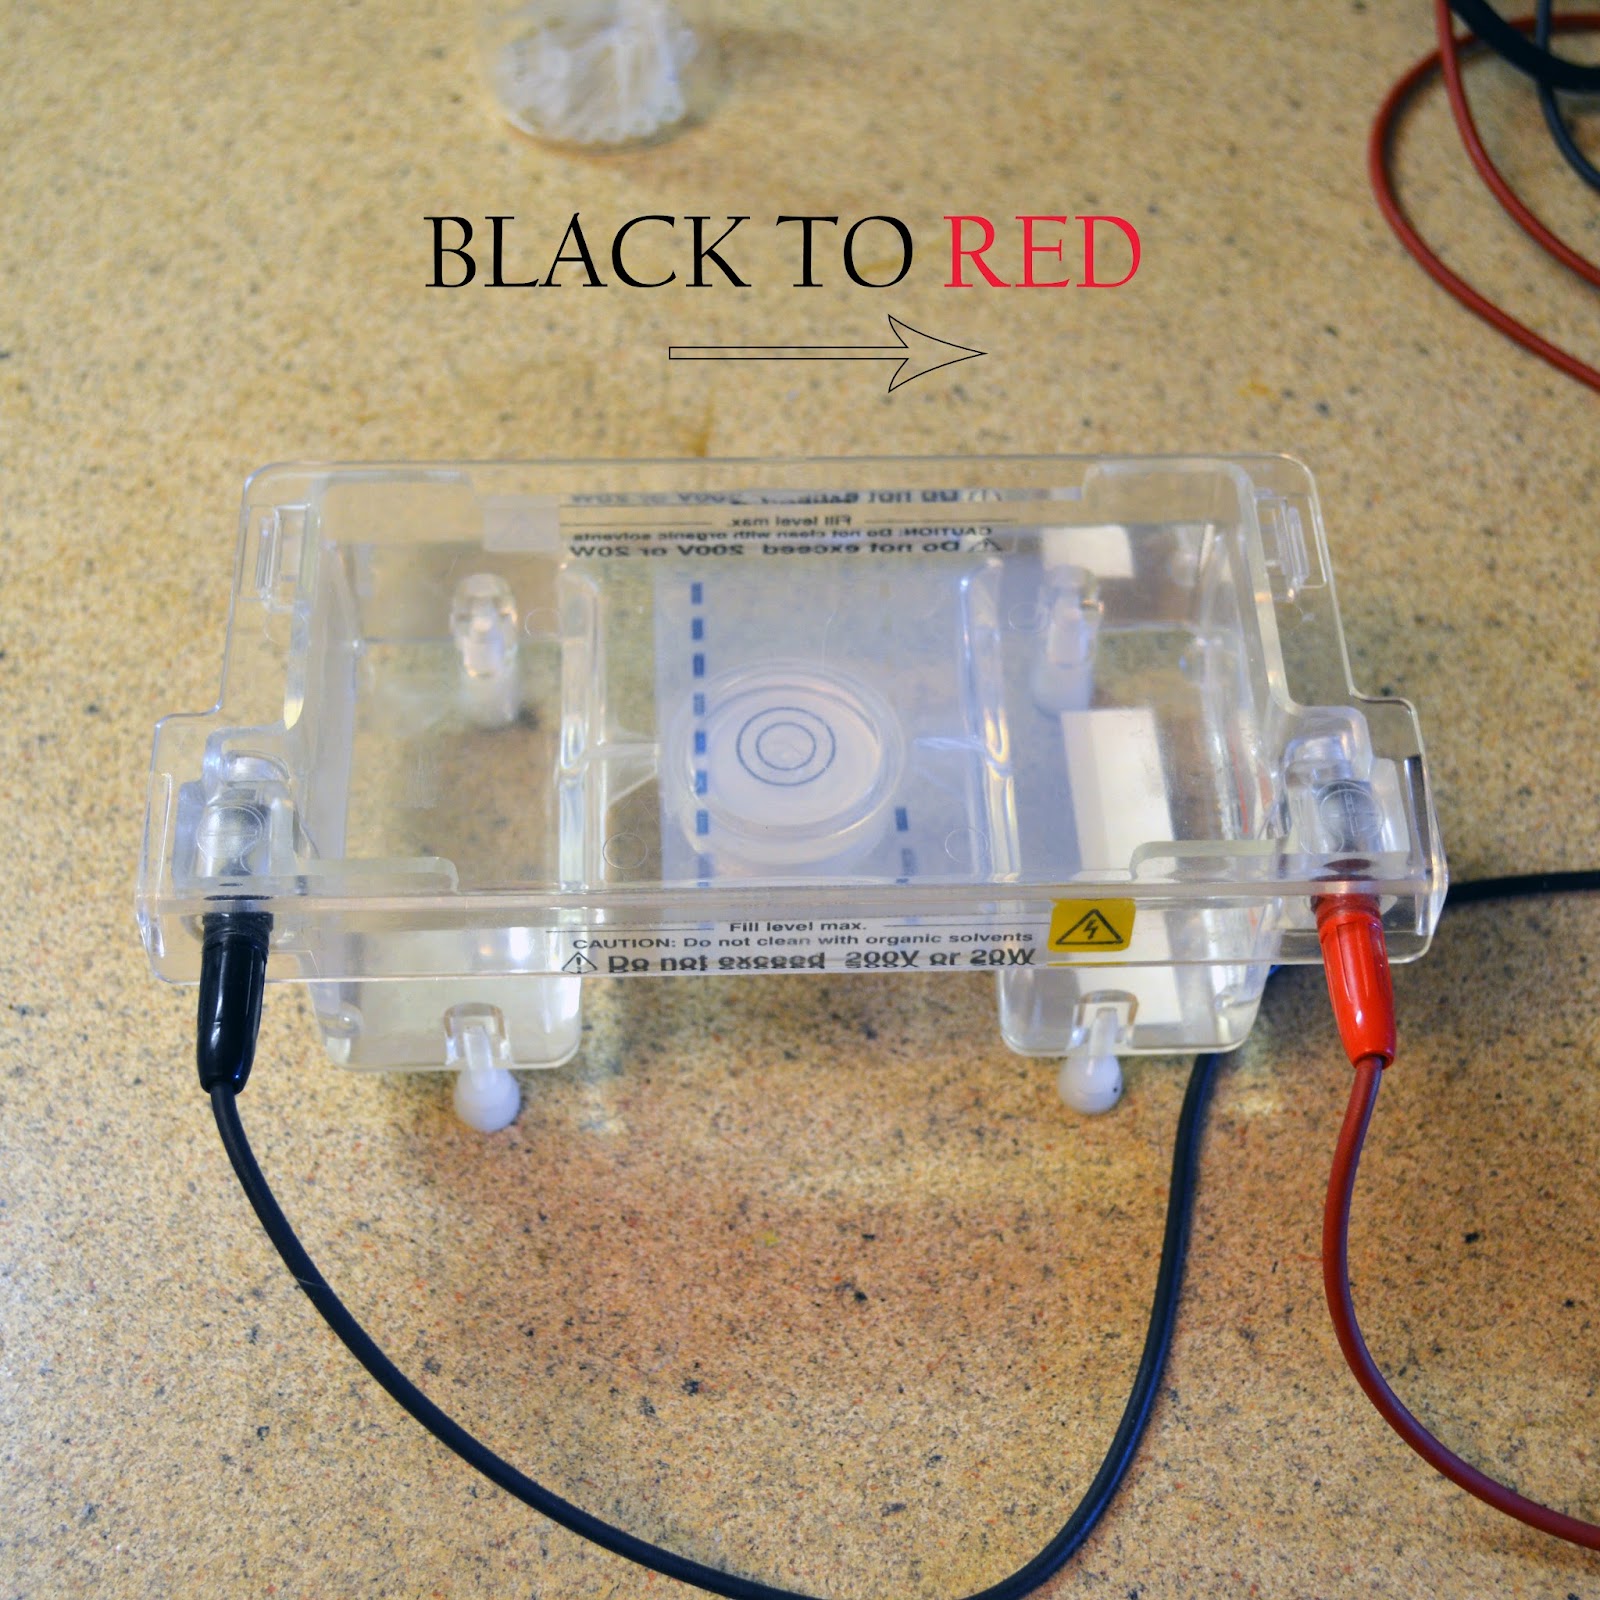
- Remove tape, then carefully remove gel from tray and place in gel electrophoresis box with the top wells nearest to the black plug.
Step 4:
Fill Box with Buffer and Pipette samples
- Place the gel into the electrophoresis box with the wells created by the comb nearest to the black electrodes. Some boxes don’t have colored electrodes. Just connect the wire coming from the power supply black jack to the side with the wells when finished loading.
- Fill electrophoresis box with TAE Buffer until it slightly covers the top of the gel.
- The DNA ladder will already have a loading buffer. You must mix your samples with a loading buffer so that the samples will stay in the wells.
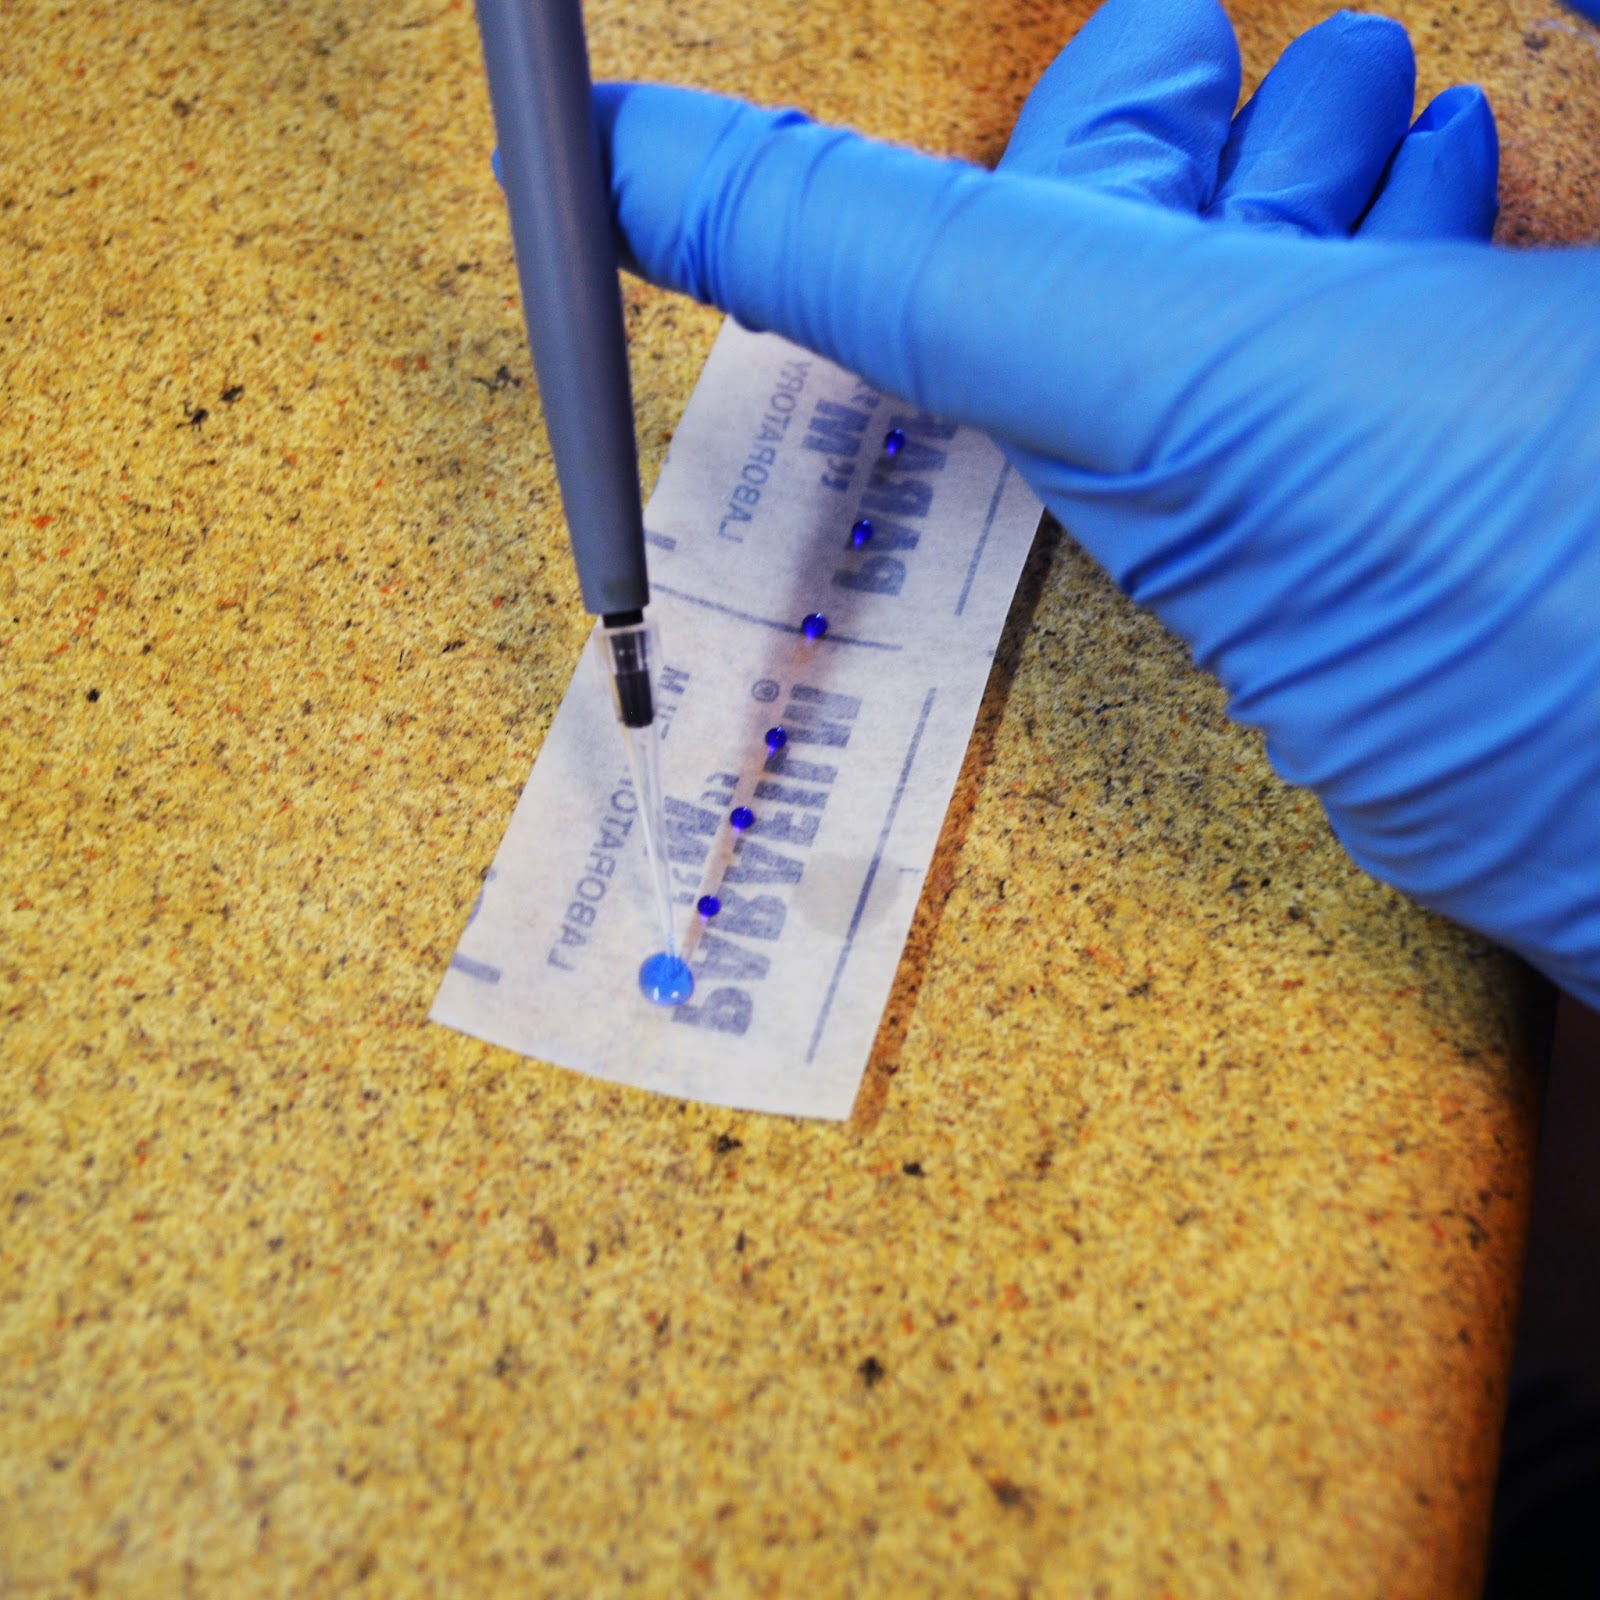
- Pipette loading buffer (6x) into your PCR reaction if you don’t need to save it for further use. Add 9uL 6x Loading Buffer to 50uL PCR reaction or 5uL Loading Bufferto a 25uL PCR reaction. Alternatively you can pippete the loading dye onto parafilm, aluminium foil, or saran-wrap material for each sample. Keep droplets spaced apart like in the picture.
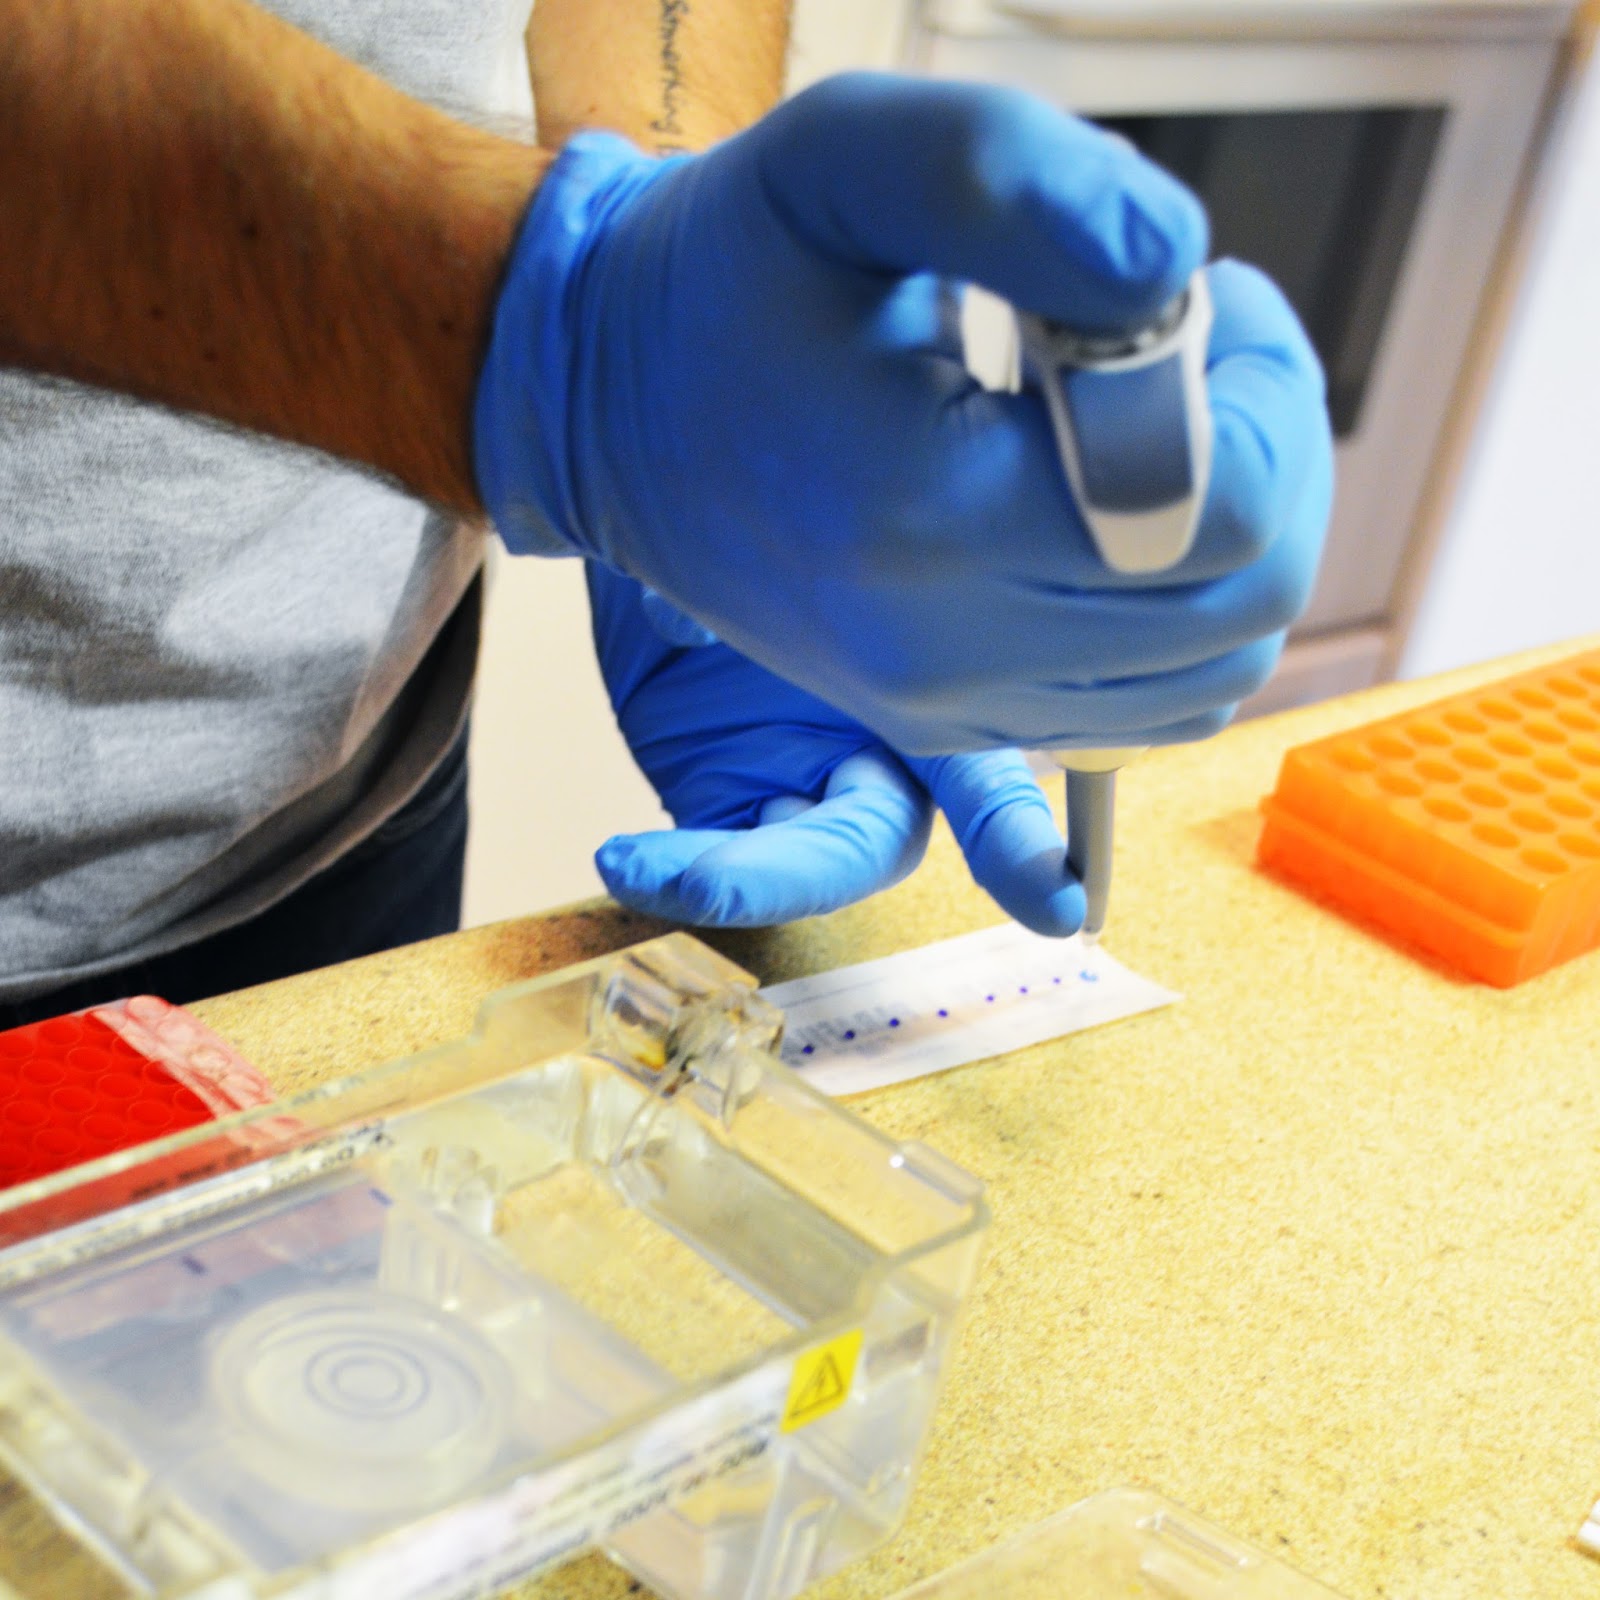
- Pipette 10uL of sample onto droplet of loading buffer on the parafilm or material. Pipette up and down to mix together, then re-load pipette with mixture and transfer to a well in the gel. Repeat for all samples.
- Your DNA ladder should be kept in the freezer and will need time to thaw before loading. Just warm up tubes in your hands until ready. DO NOT MICROWAVE OR PUT IN HOT WATER
Step 5:
Connect electrodes to box and run the power
- Connect electrodes to electrophoresis box. The black electrodes should be on the side of the wells and the sample will move towards the red.
- Check on the gel every 10 minutes and use your trans-eye-luminator glasses and blue light to identify bands.
Cool Fact:
You can reuse a gel
DNA disappears into gel rendering it untraceable
BE SURE YOUR POWER SOURCE IS TURNED OFF
- You can reuse some of your buffer solution as well, but it electrolyzed, so only do this once.
- Dump out half of your buffer solution and remove gel-solid.(careful it can slip out of your hands)
- Break up gel into pieces small enough to fit in microwaveable vessel used in Steps 2 and 3
- Repeat Steps 2 and 3
- Place Gel back in electrophoresis box and fill with buffer until it again covers the gel.