
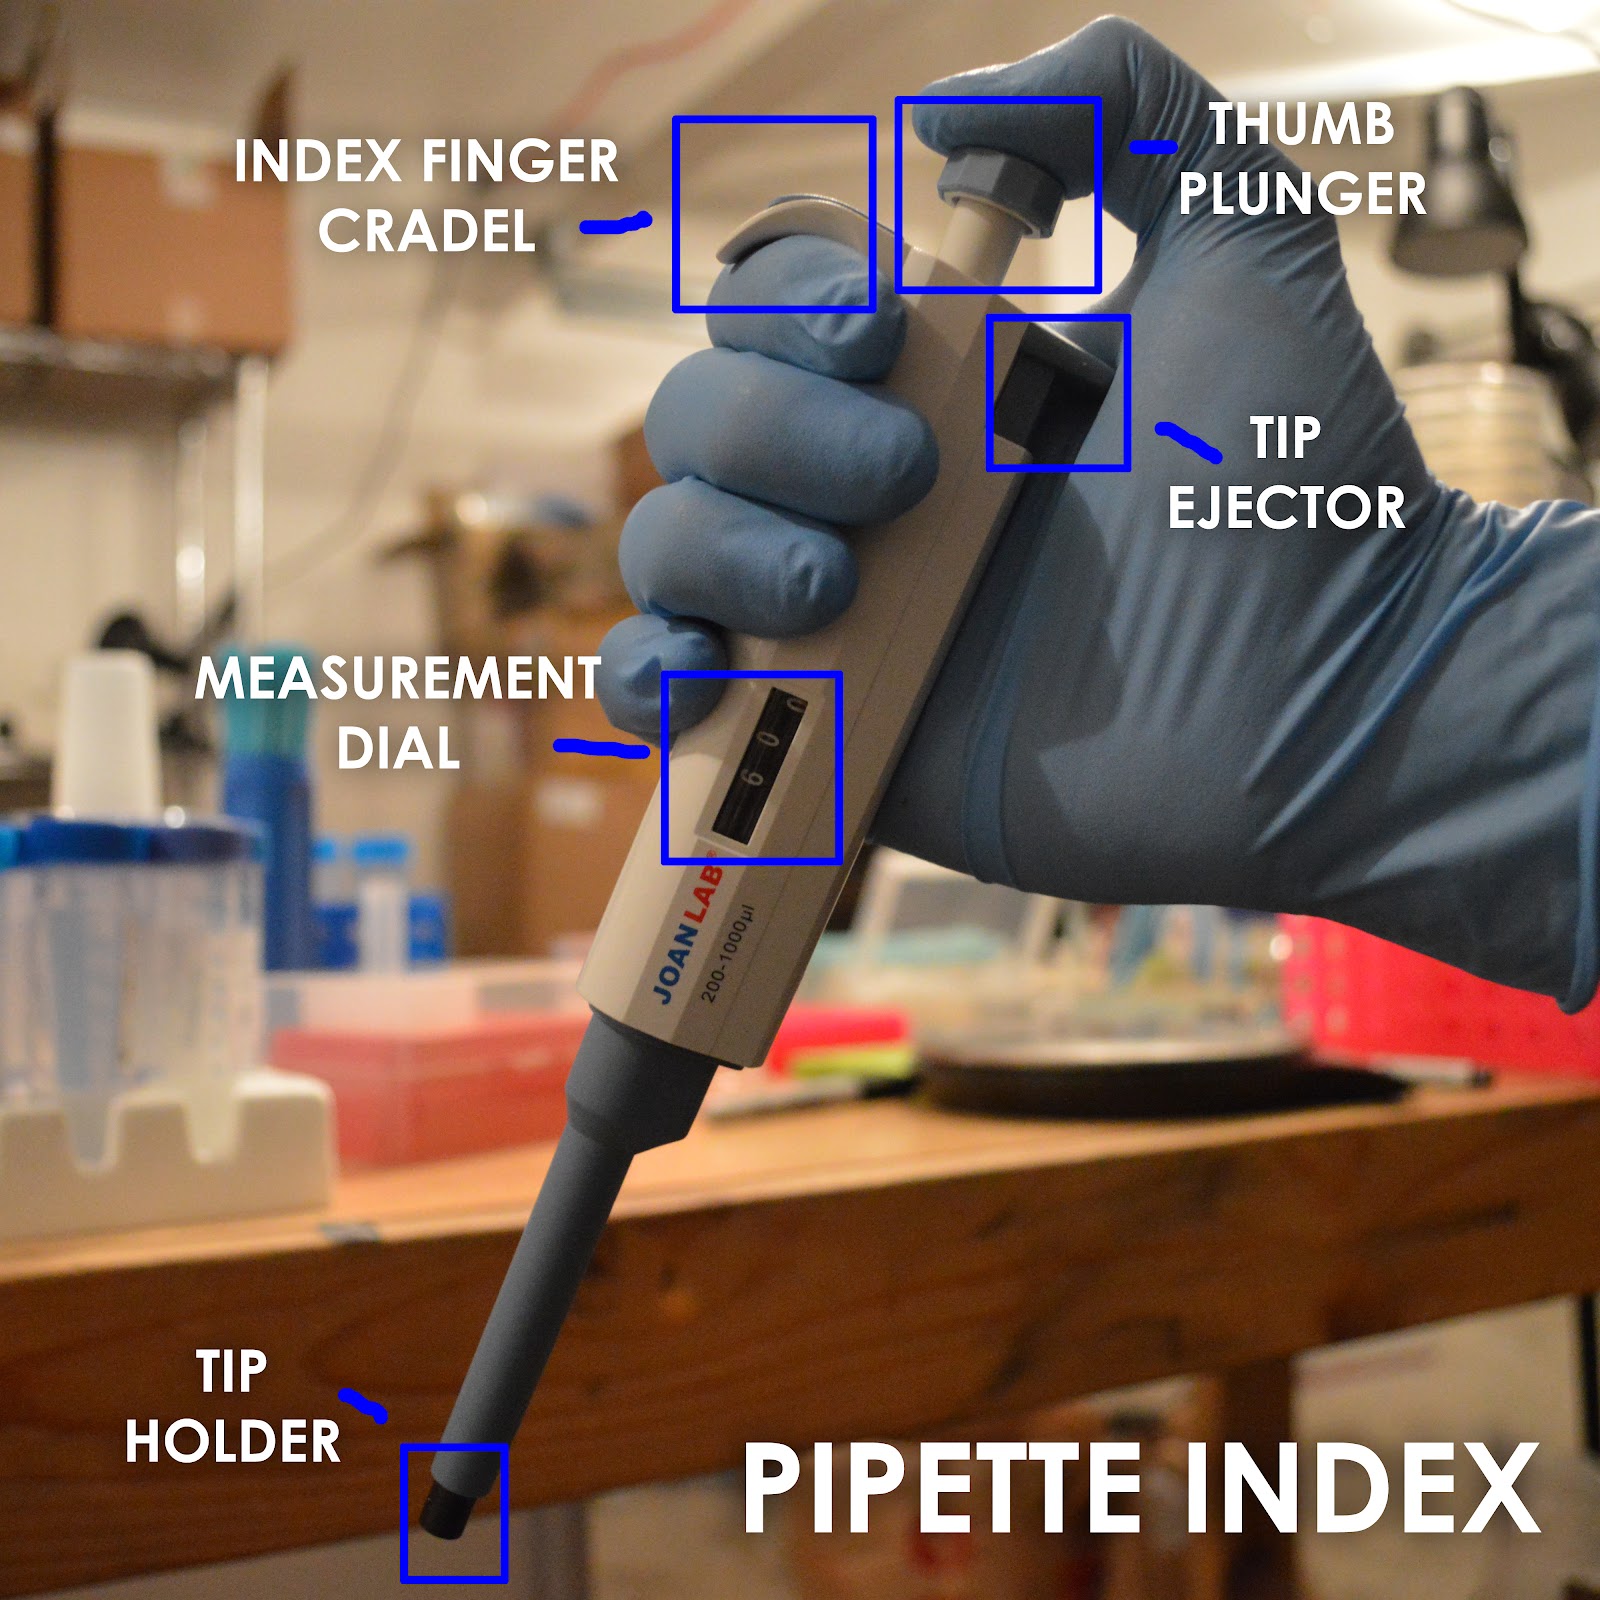
Learning to pipette is very important to all of your research projects. Your experiments depend on the accuracy of you and your device. The pipette in this protocol measures units in microliters(abbreviated uL) (there are 1000 microliters in a mL or milliliter).
Pipettes come in various capacities, and the pipette we are using for this walkthrough is a 200-1000uL, yours may be different, but the information is transferable.
When finding the correct pipette tips(a disposable tip made for single use) you use the higher number on the device to identify its size. 200-1000 is a 1000uL device.
Lesson #1
Thumb Plunger
- There are 3 stages to the plunger.
- Resting(fig.1), Desired Measurement(fig.2), and Full Discharge(fig.3).
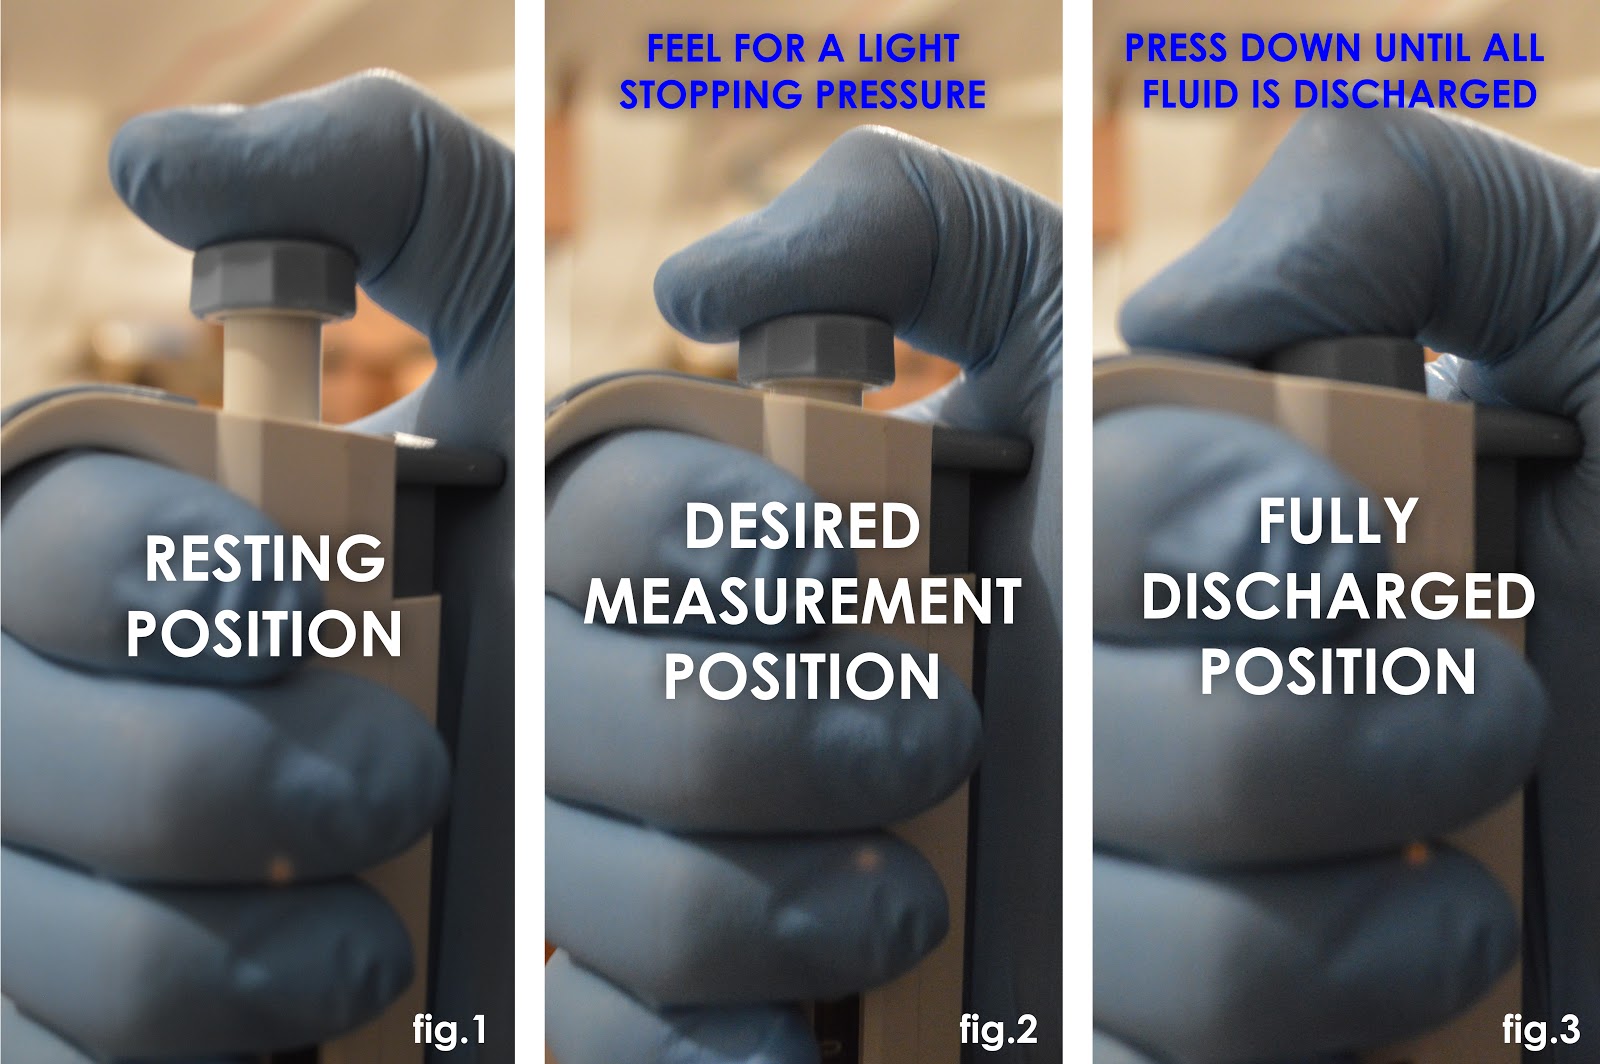
*Note: The desired measurement position is something you want to practice often as that is the threshold where you decide your accuracy at.
Lesson #2
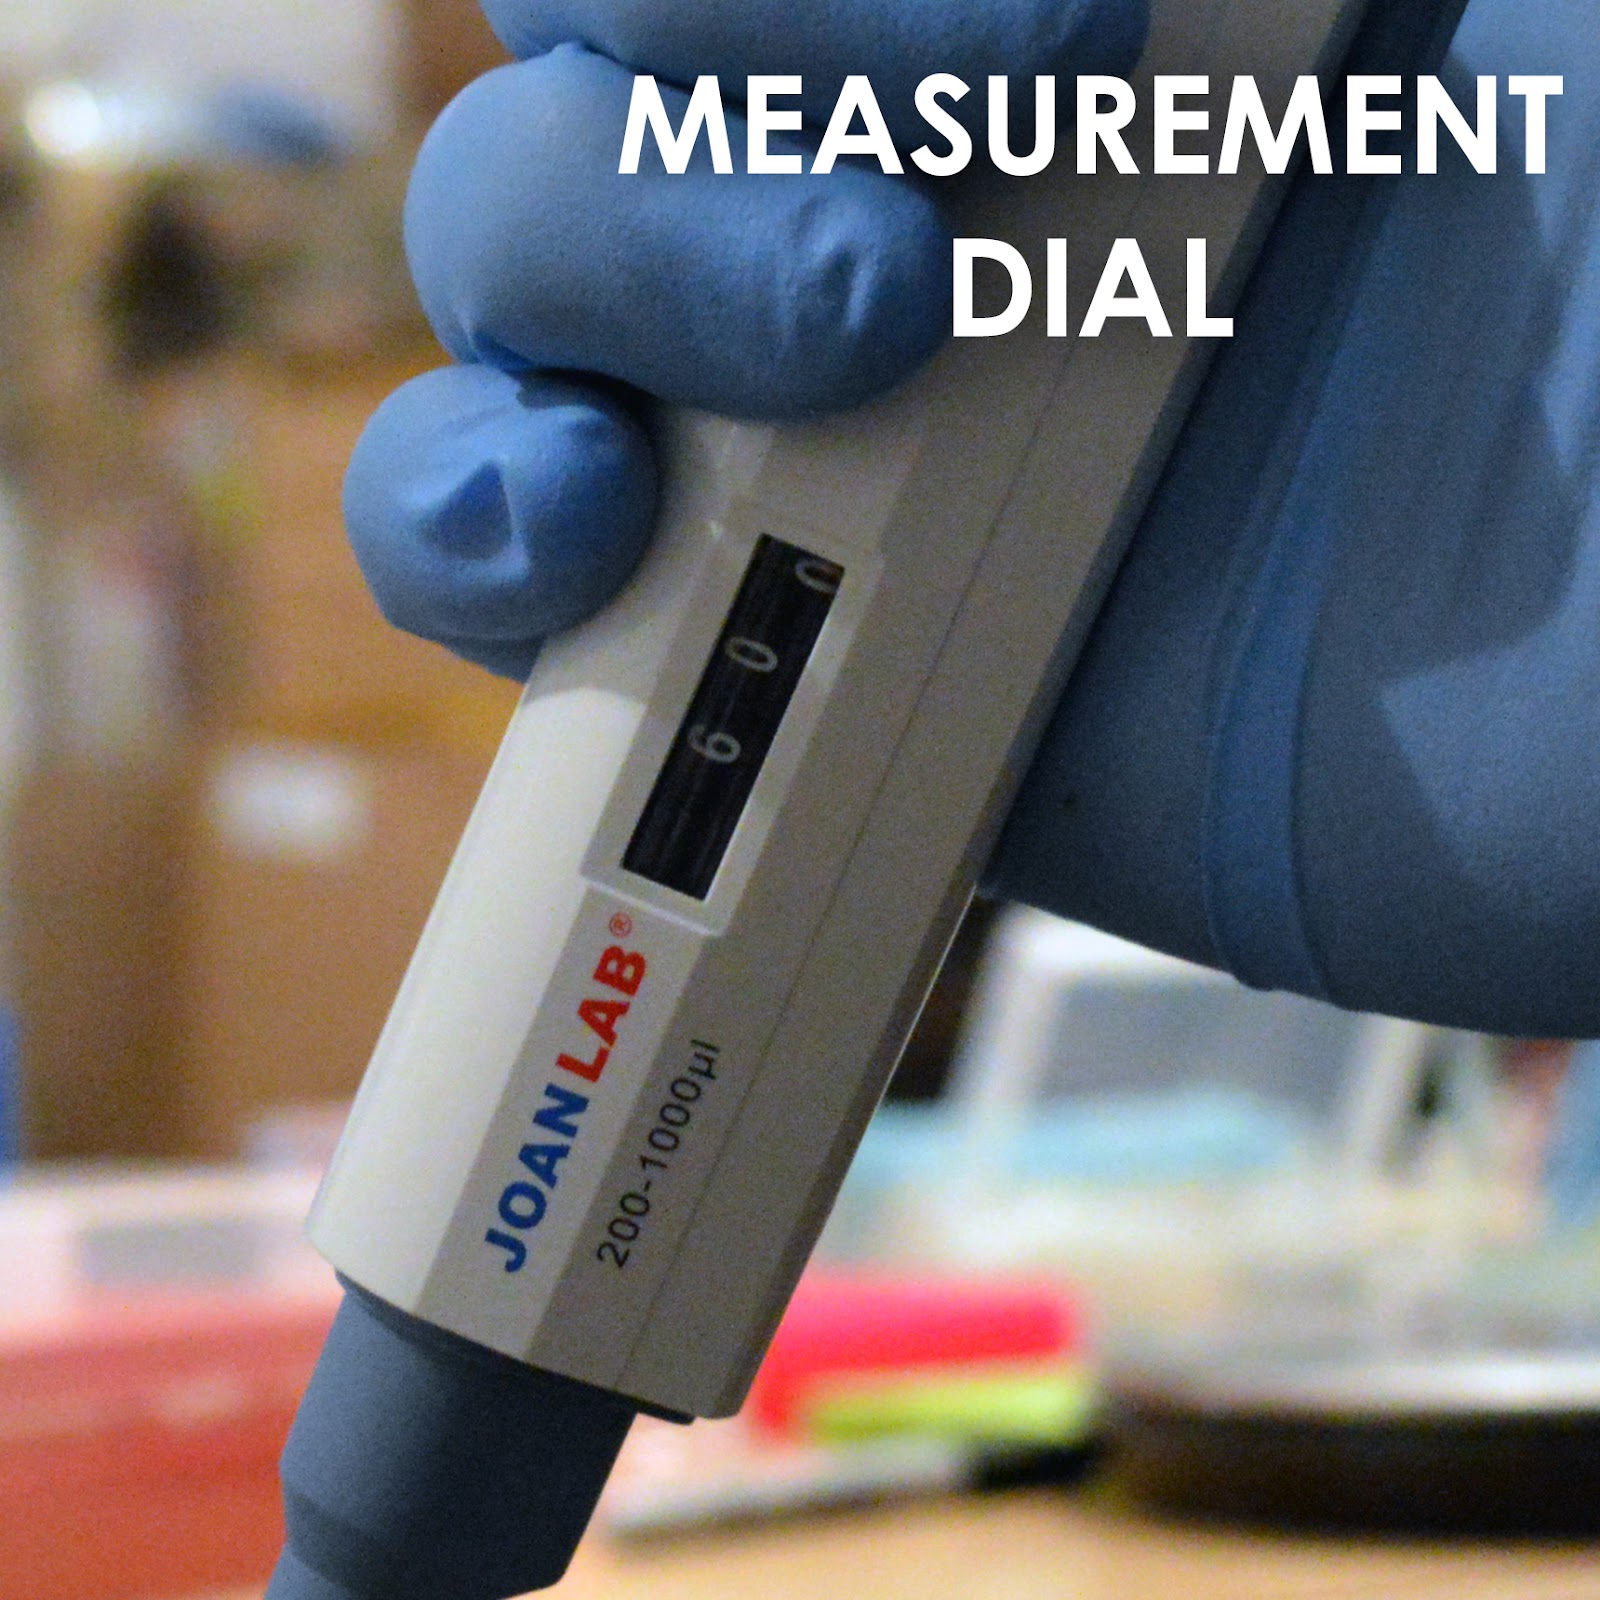
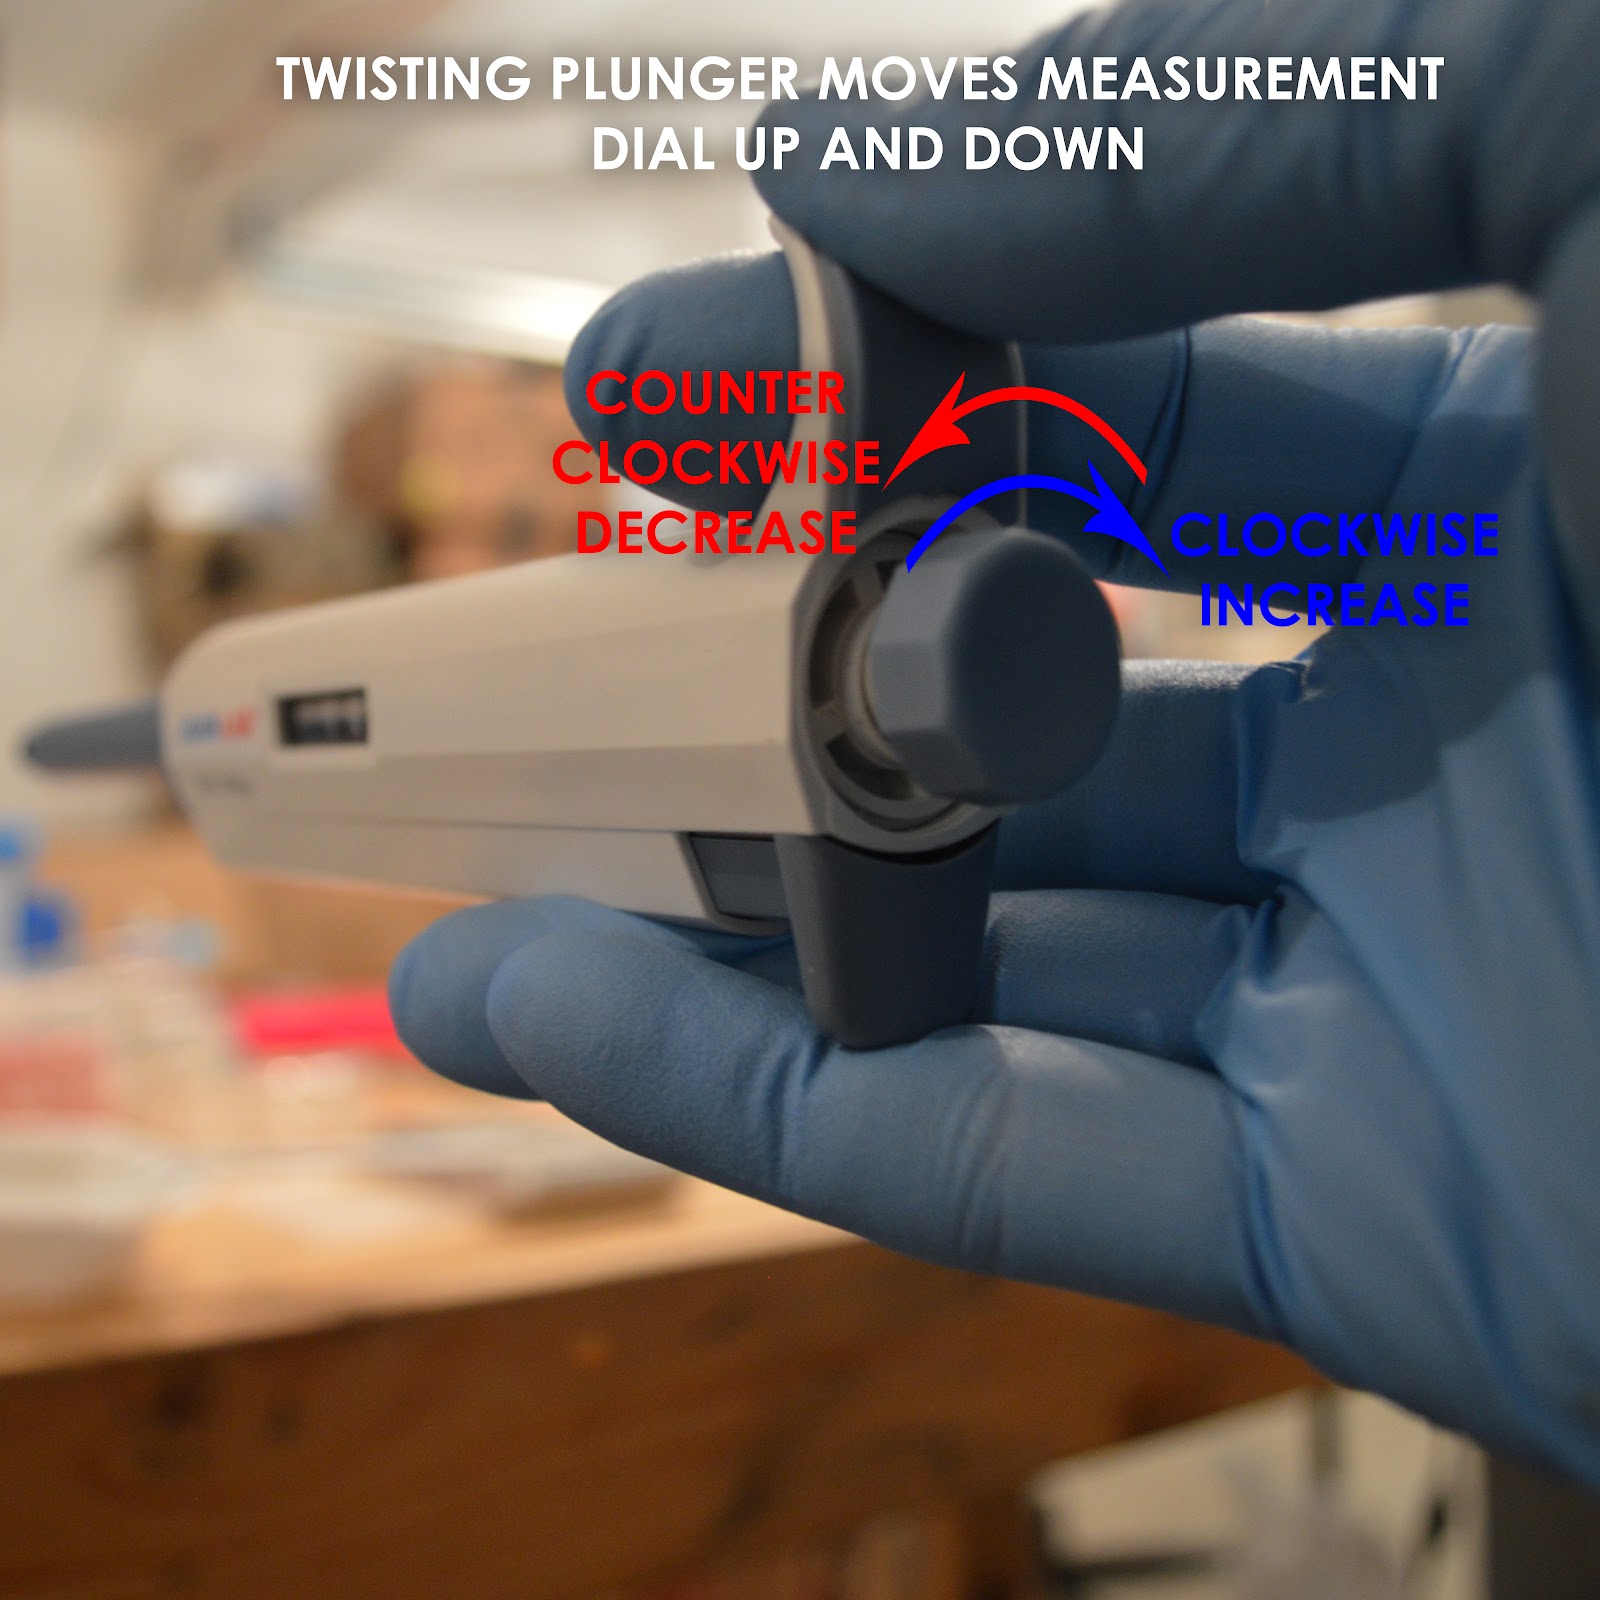
Measurement Dial
- The dial on this device can move from 200-1000uL.
- The pipette also permits a small amount of cushion below and above the labeled thresholds.
- To adjust the amount desired, you turn the plunger clockwise to increase and counterclockwise to decrease looking at it from above.
Lesson #3
Transferring fluid from one vessel to another.
Step 1:
- Retrieve tip from box by inserting the tip holder into the open end of the tip.
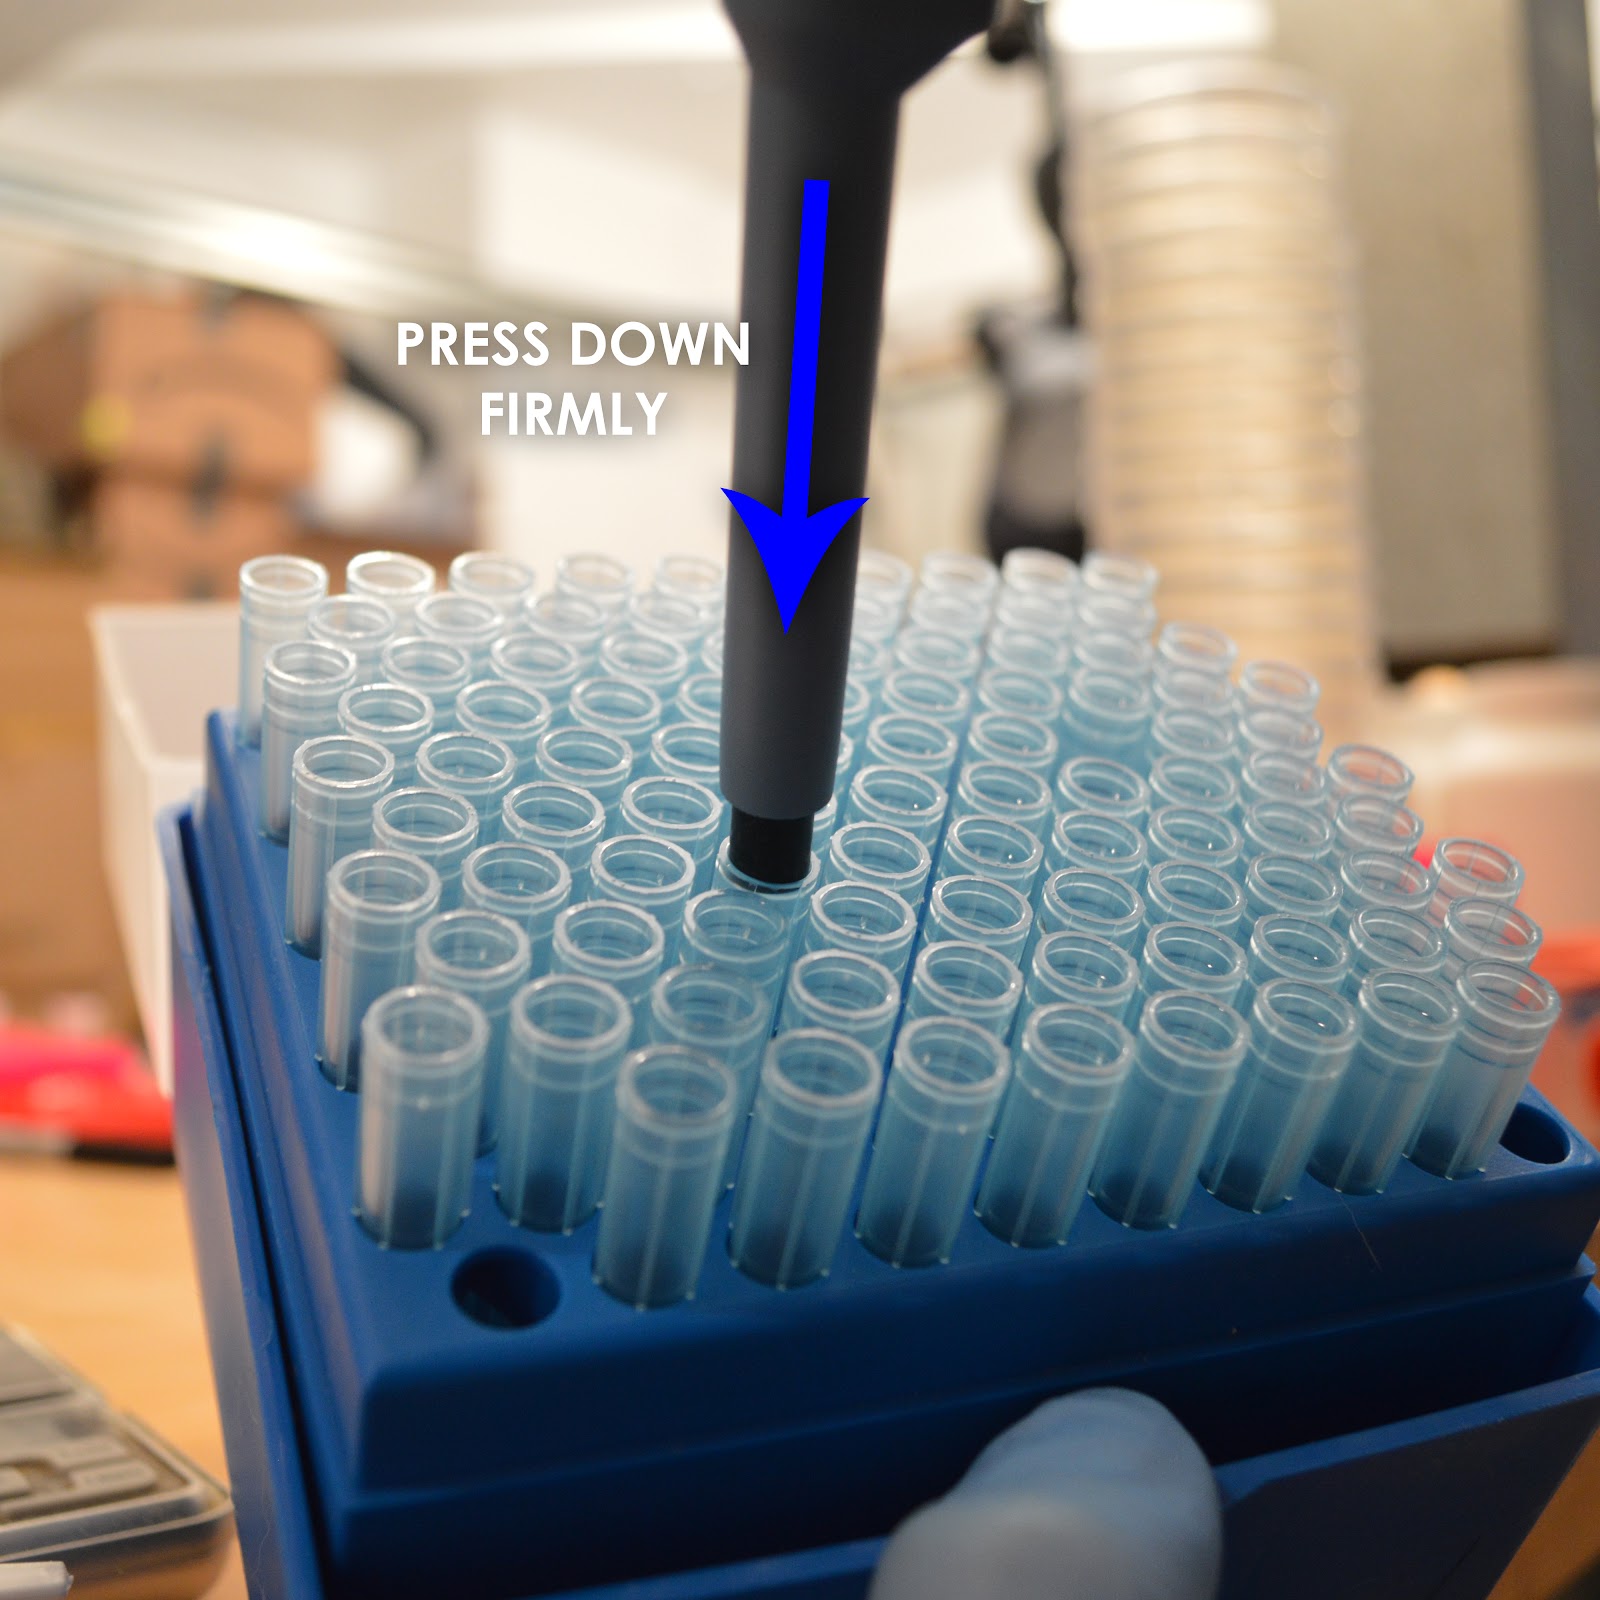
*Note: Remember to keep tip away from any contamination during this process
Step 2:
- Transferring quantities of product.
- Take tube with product and tilt at angle to better see what you are doing.
- Press thumb plunger down to Desired Measurement(fig.2) and dip tip far enough into product for retrieval.
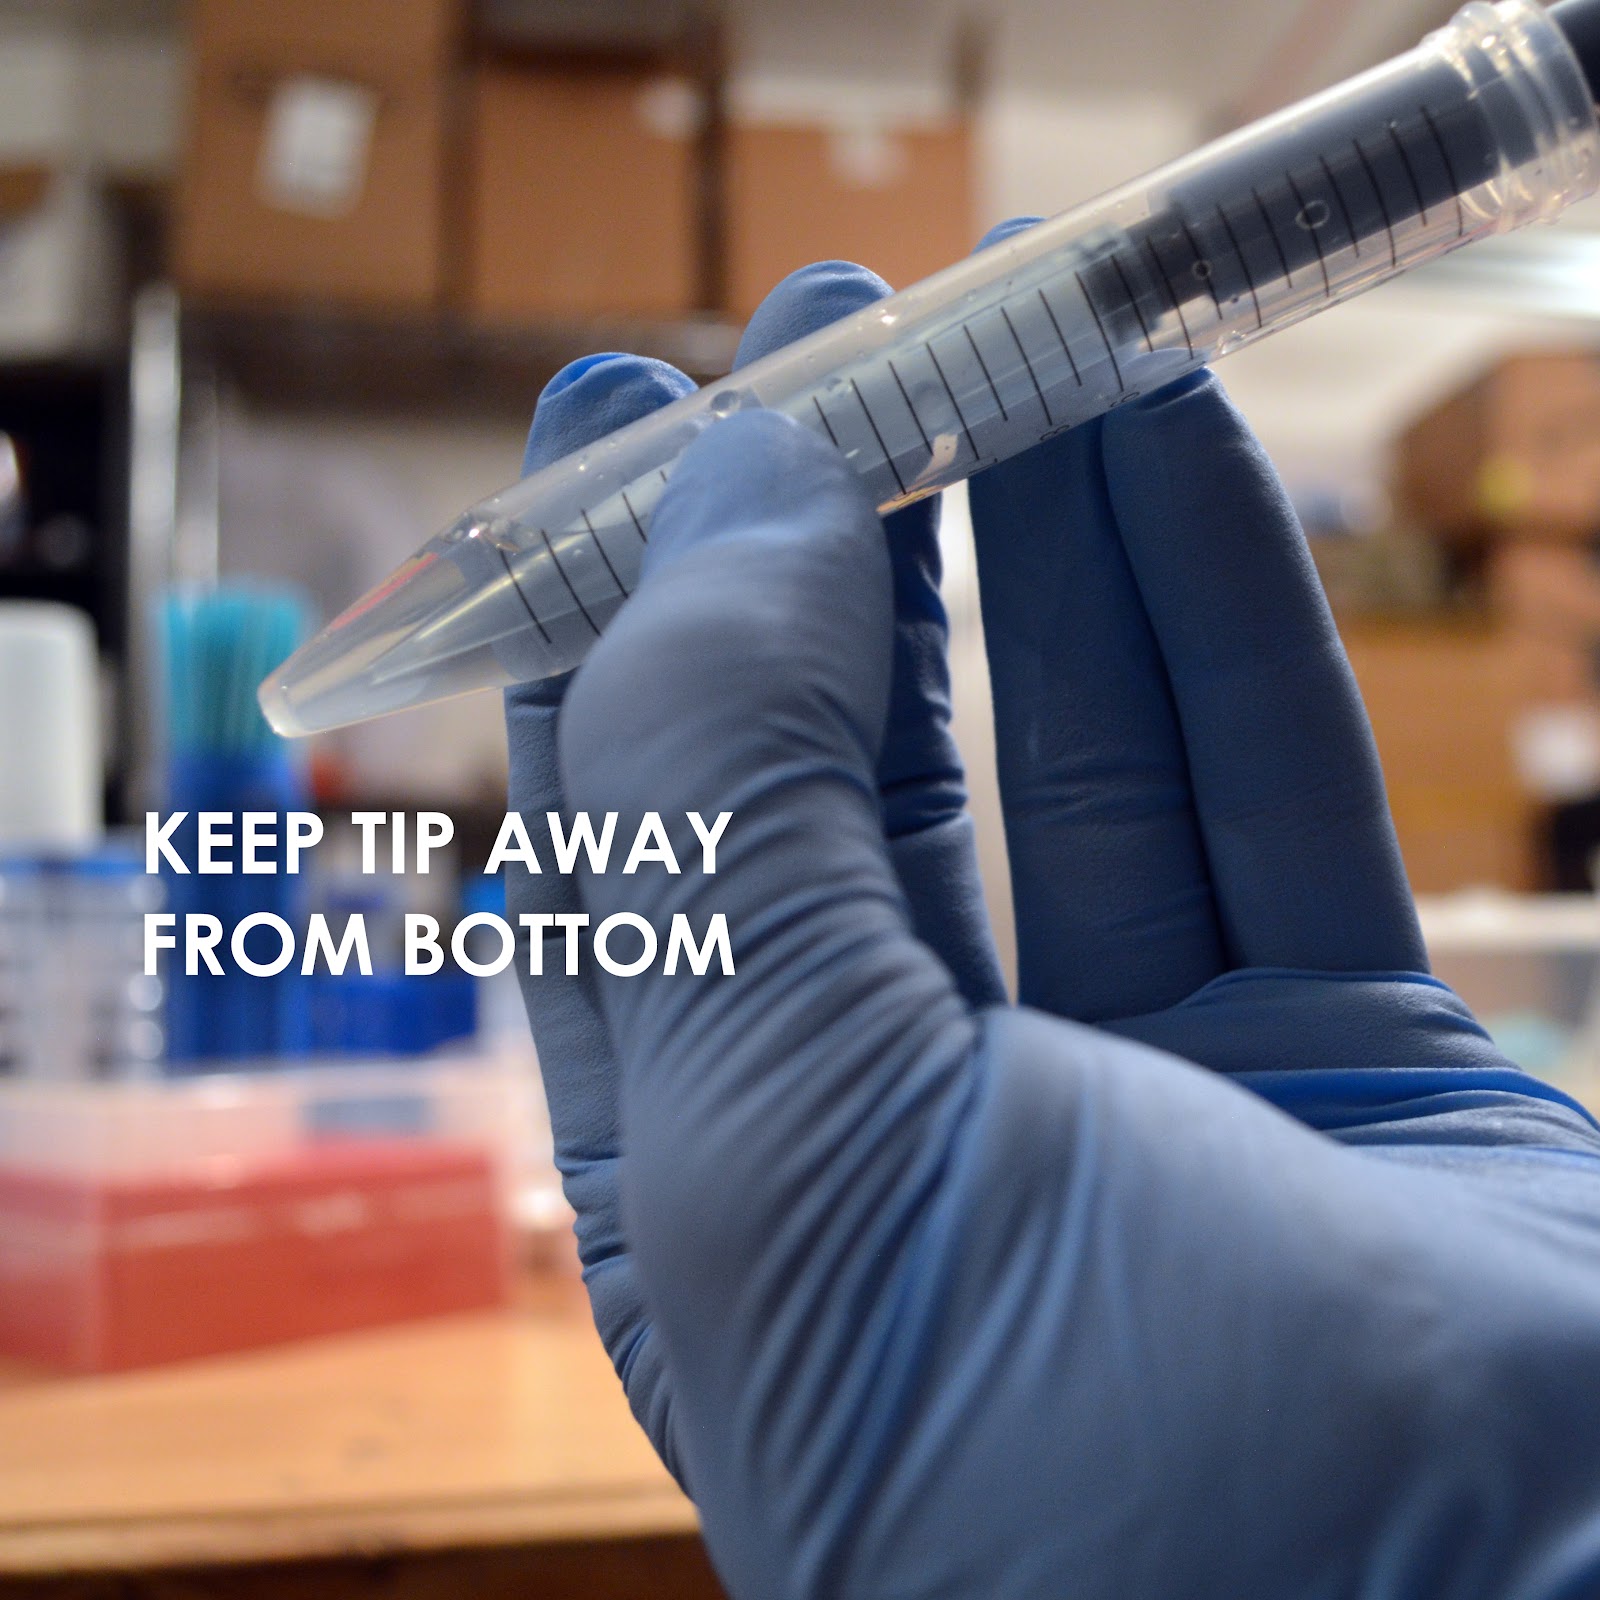
*Note: Do not press plunger all the way down way down when performing extraction.
- Slowly depress thumb plunger while slowly moving tip deeper into fluid
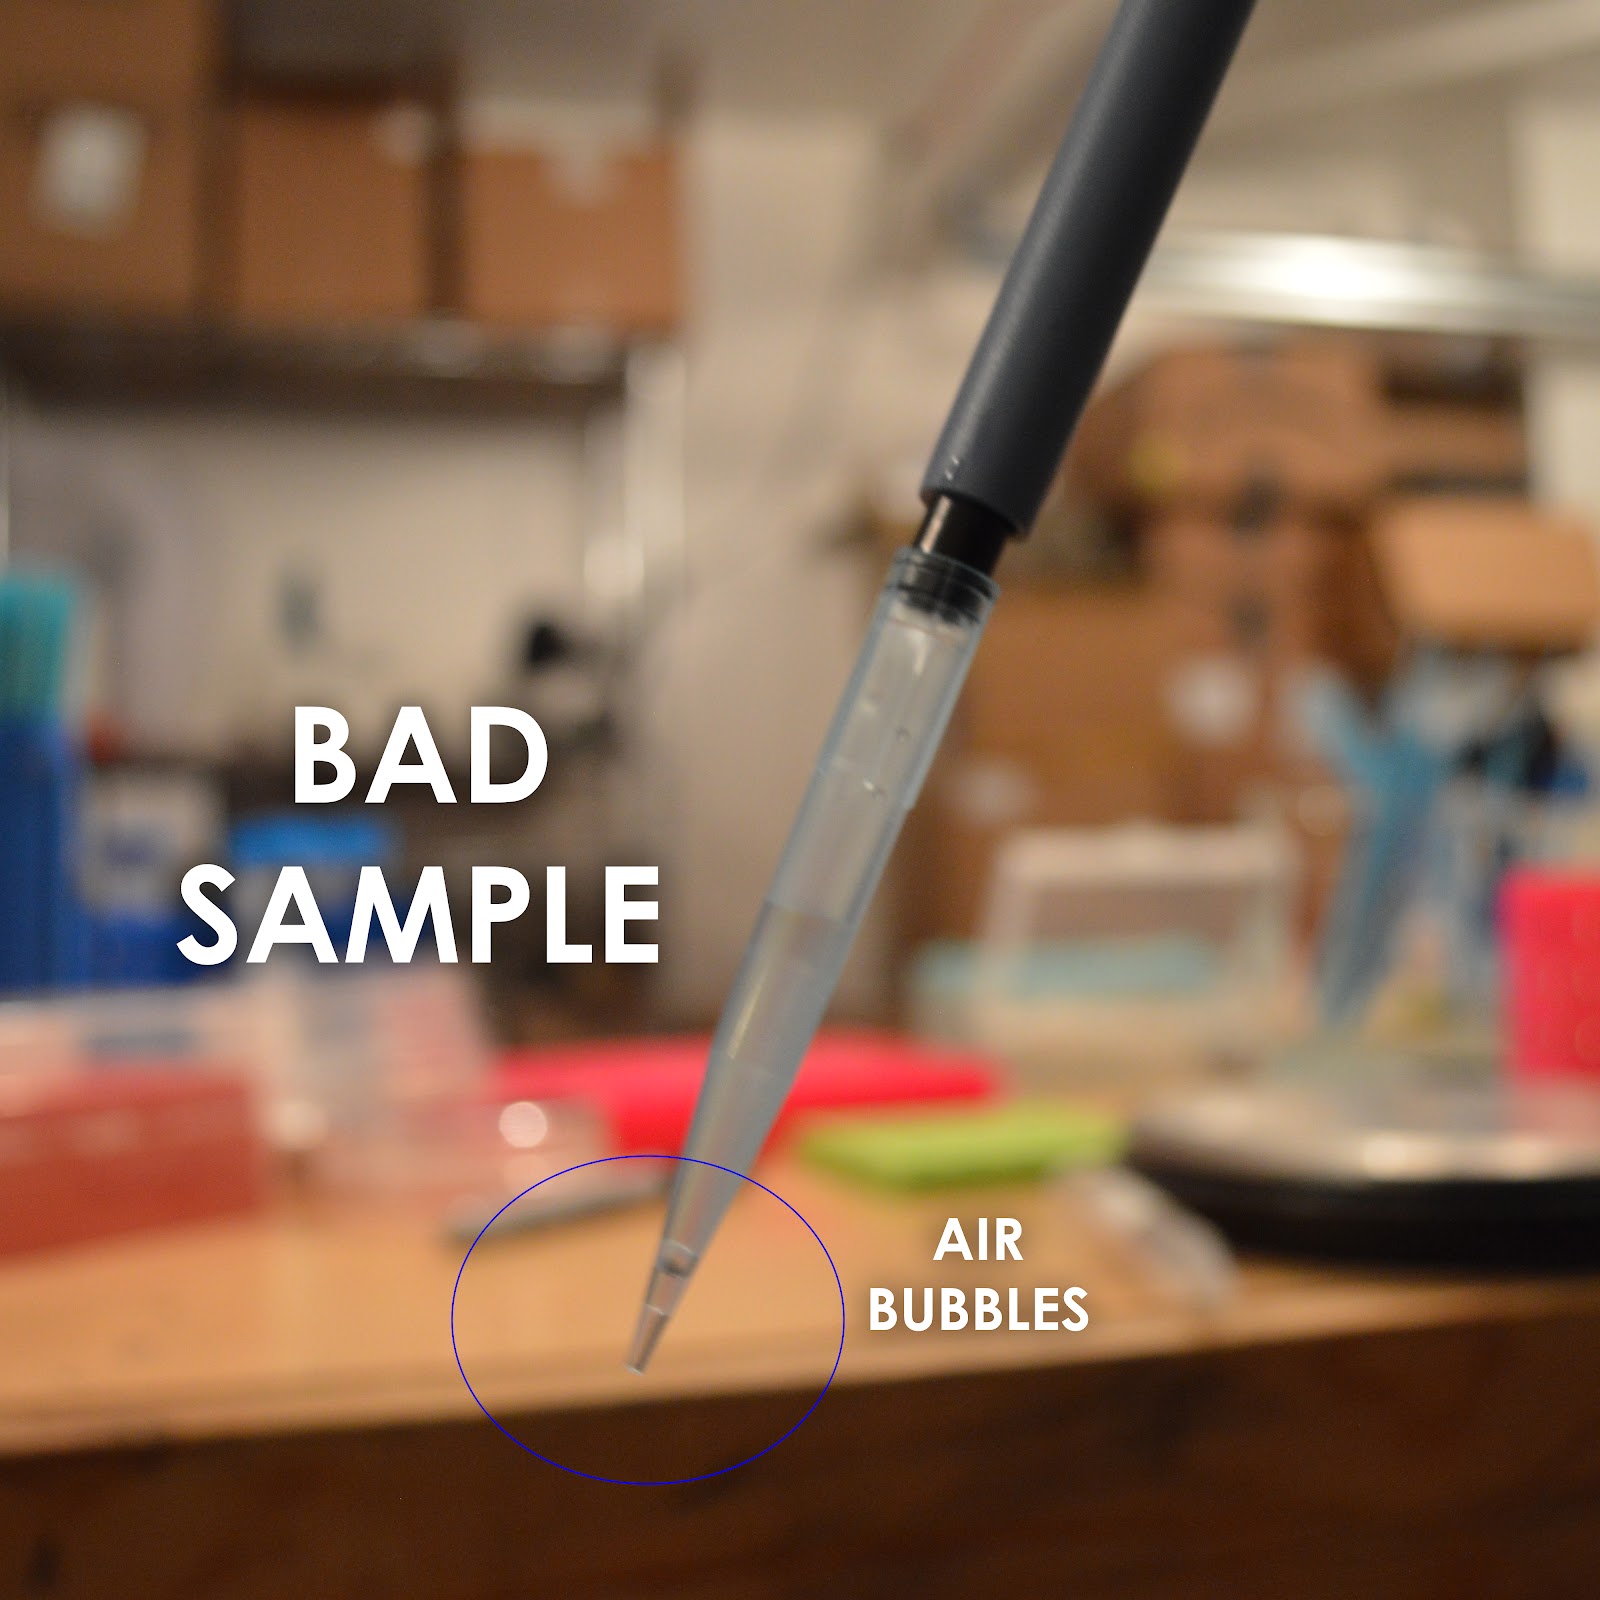
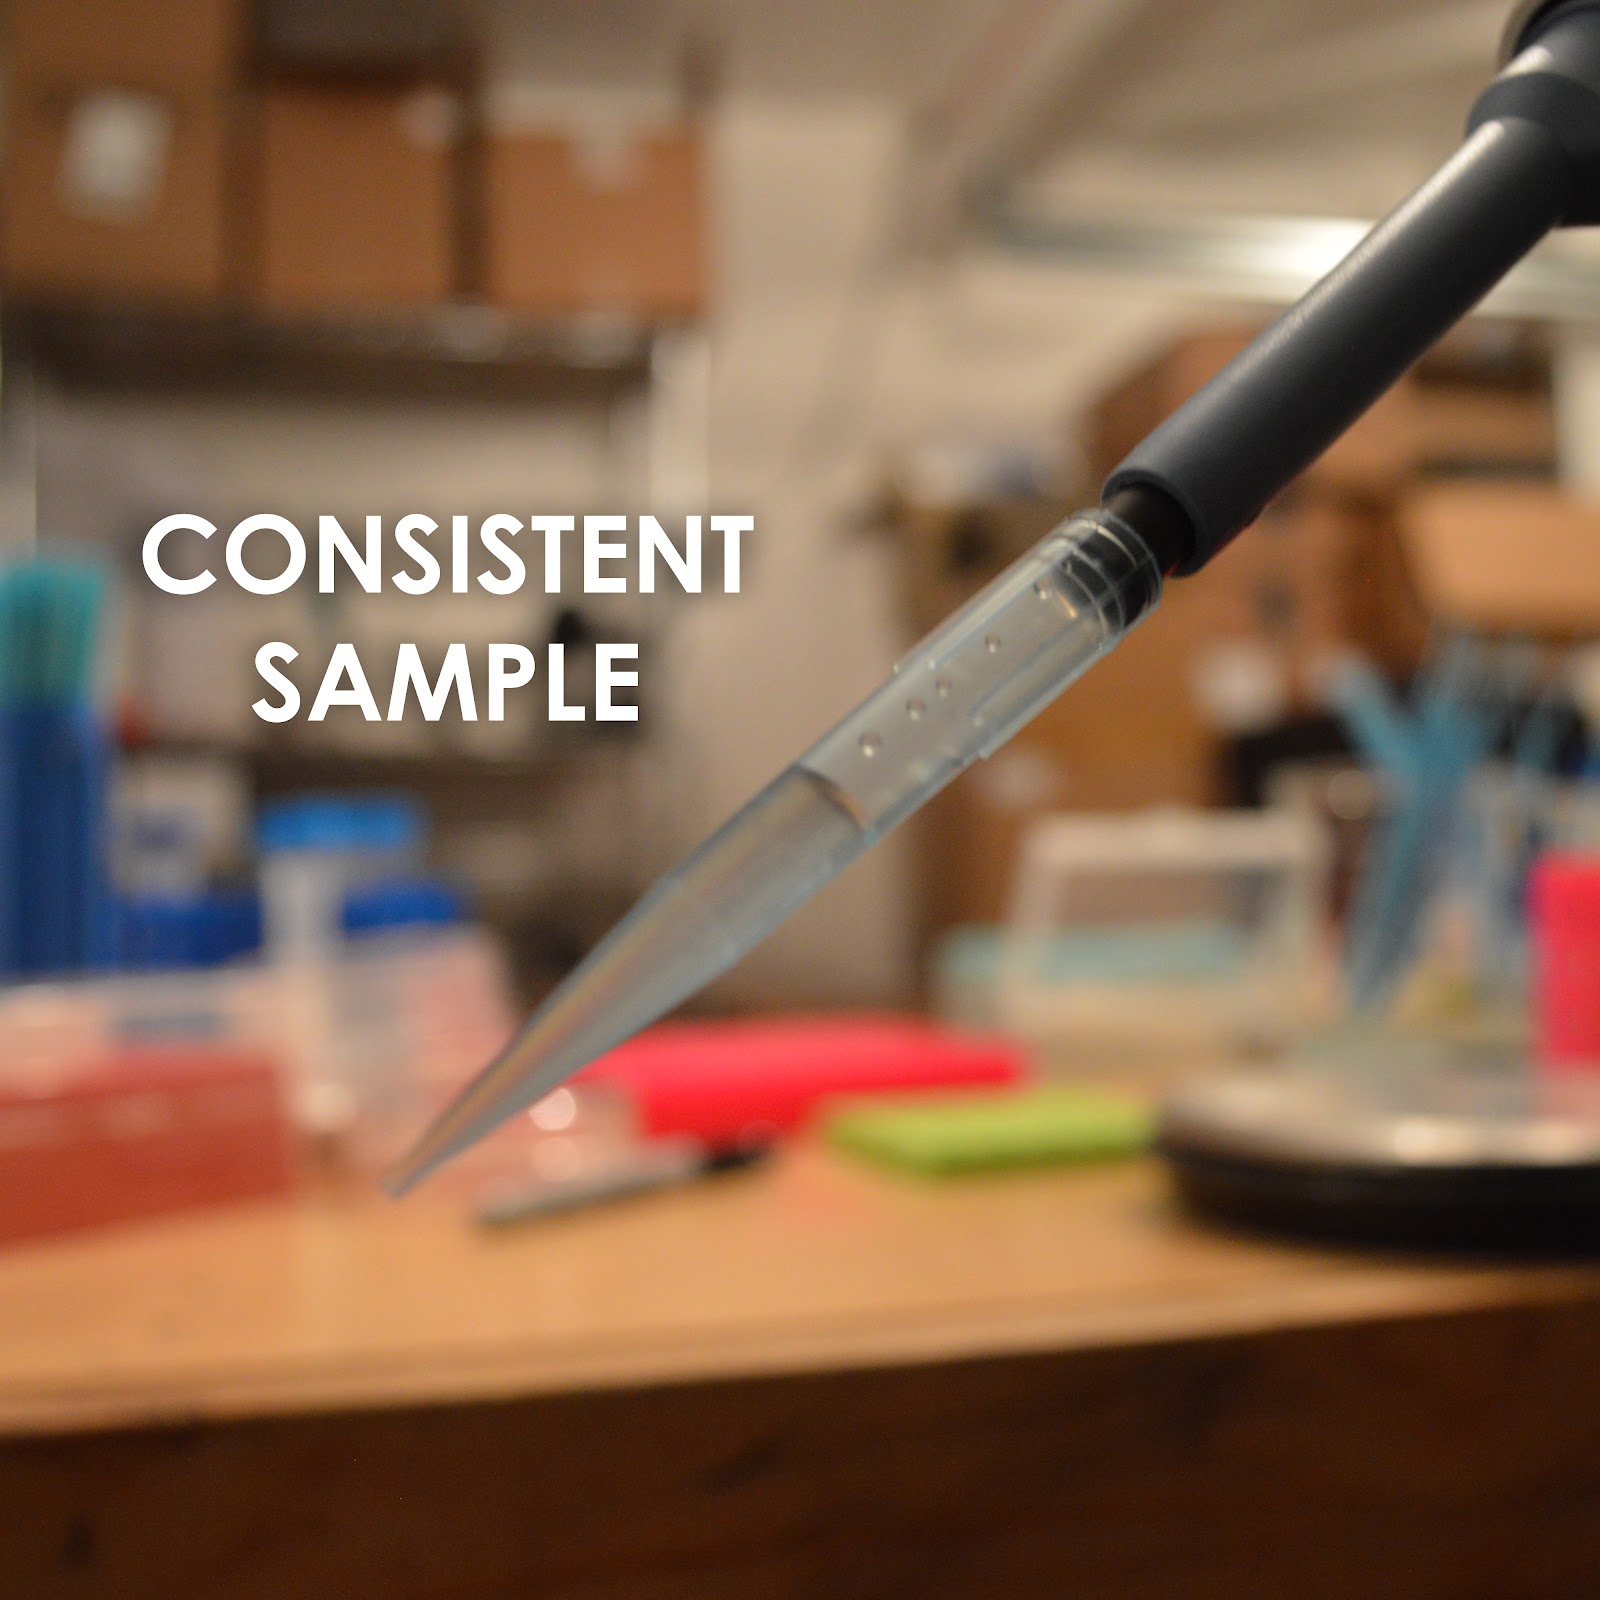
- This prevents the mistake of retrieving an air bubble. Air bubble means accuracy is questionable.
*DO NOT PRESS TIP TO BOTTOM*
- This can create a seal causing air bubbles.
Examples of Bad Sample and Consistent Sample below.
Place tip in transfer vessel and press thumb plunger til you reach Full Discharge position often even pressing a couple of times to get all of it out remaining outside previously discharged fluid so that you don’t suck it up on the depress.
When finished press the Tip Ejector while aiming it at a waste can for the used tip to land into.