
Engineer Any Yeast To Fluoresce
Introduction:
Genetic engineering involves modifying an organism’s DNA to deliberately change an aspect of the organism for a particular purpose. This kit demonstrates the power and simplicity of genetic engineering by adding plasmid DNA to the yeast Saccharomyces cerevisiae so that it turns a fluorescent green color from expression of the Green Fluorescent Protein (GFP). This kit can be used with the yeast provided, M29 French Saison (http://mangrovejacks.com/products/m29-french-sasion-yeast-10-g) or you can use any yeast you have on hand.
This kit requires ~10 hours of work over the course of at least 2 days. It can be completed in a weekend if fresh Yeast cultures are prepared on a Friday night. Though the yeast might take a few days to grow after that.
As this document is constantly being updated with tips and pointers and there are video links embedded, you can find the most up to date version online at:https://goo.gl/24QTB6
What is happening in this experiment?
Yeast and all organisms need to make proteins to survive. Proteins are tiny nanomachines that do everything from control our metabolism to keep our heart beating. In order to make a protein a cell uses the DNA code. Each 3 letters of DNA codes for a single amino acid and proteins are just chains of amino acids.
What we can do is trick a yeast cell into using DNA we give it by adding elements that make it believe it is it’s own. In this case we give the yeast DNA that is known to make a green flourescent protein (GFP). This makes the yeast glow in the dark under UV(a “black” light) or blue light illumination.
This yeast and plasmid DNA with the kit are being released through a Creative Commons Non-Commercial License and we encourage you to share it. For large scale commercial brewing we ask that you contact us for a license at case@the-odin.com.

Kit contents(pg. 4)
Timeline(pg. 5)
Making Plates(pgs. 6-7)
Making Competent Yeast(pgs. 8-9)
DNA Transformation(pgs.10-11)

1 - YPD Agar
1 - YPD Agar containing G418
1 - 250 mL glass bottle for pouring plates
1 - 10-100uL professional lab grade variable volume adjustable pipette
1 - Box (96 count) 1-200uL Pipette Tips
14 - Petri Plates
1 - Microcentrifuge tube rack
5 - Inoculation Loops / Plate spreader / Pairs of Nitrile Gloves in plastic bag
25~ - microcentrifuge tubes
6 - 1.5mL microfuge tubes containing YPD
50mL centrifuge tube for measuring liquid volume
0.75 mL Yeast transformation buffer 40% PEG 8000, 200mM LiAc, 0.1mg/mL Salmon Sperm DNA
1 - Preengineered strain of Yeast Containing GFP Plasmid on plate (liquid culture in a tube if international)
1 - UV Filter glasses and blue light
Perishables
Saccharomyces cerevisiae strain
Yeast GFP Expression plasmid 100ng/uL

Preparation
-
1 hour Make plates (set aside more time if it's your first time making plates)
-
streak out Yeast onto a YPD Agar plate (takes ~1 min)
-
12-18 hoursLet the yeast grow (easiest to just let it sit overnight)
Day of experiment
-
Mix together sample, plasmids, and transformation mix (takes ~5 min)
-
60 min‘heat shock’ the sample warm (42ºC/108ºF) water.
-
Add YPD media to your cell solution (takes ~1 min)
-
4 hourincubate at 30C, (or if @ room temp, incubate overnight)
-
10 min Plate 400uL of the yeast solution and let dry for 10 minutes
Incubate and wait for growth
-
~48 hours Incubate the plate at 30ºC (80ºF) for 24-48 hours or room temperature for 48+
hours.

Making Plates (~1 hour, maybe more time if it’s your first time)
Step by step walk-through with photos at:https://goo.gl/7yzpA1
Agar plates provide a solid media nutrient source for yeast to grow on. The standard media that is used is Y(E)PD (Yeast Extract, Peptone, Dextrose). This contains a carbon source, a nitrogen source. Strains of that are used in genetic engineering are also what are called auxotrophic meaning that they can’t synthesize certain things that they need for survival.
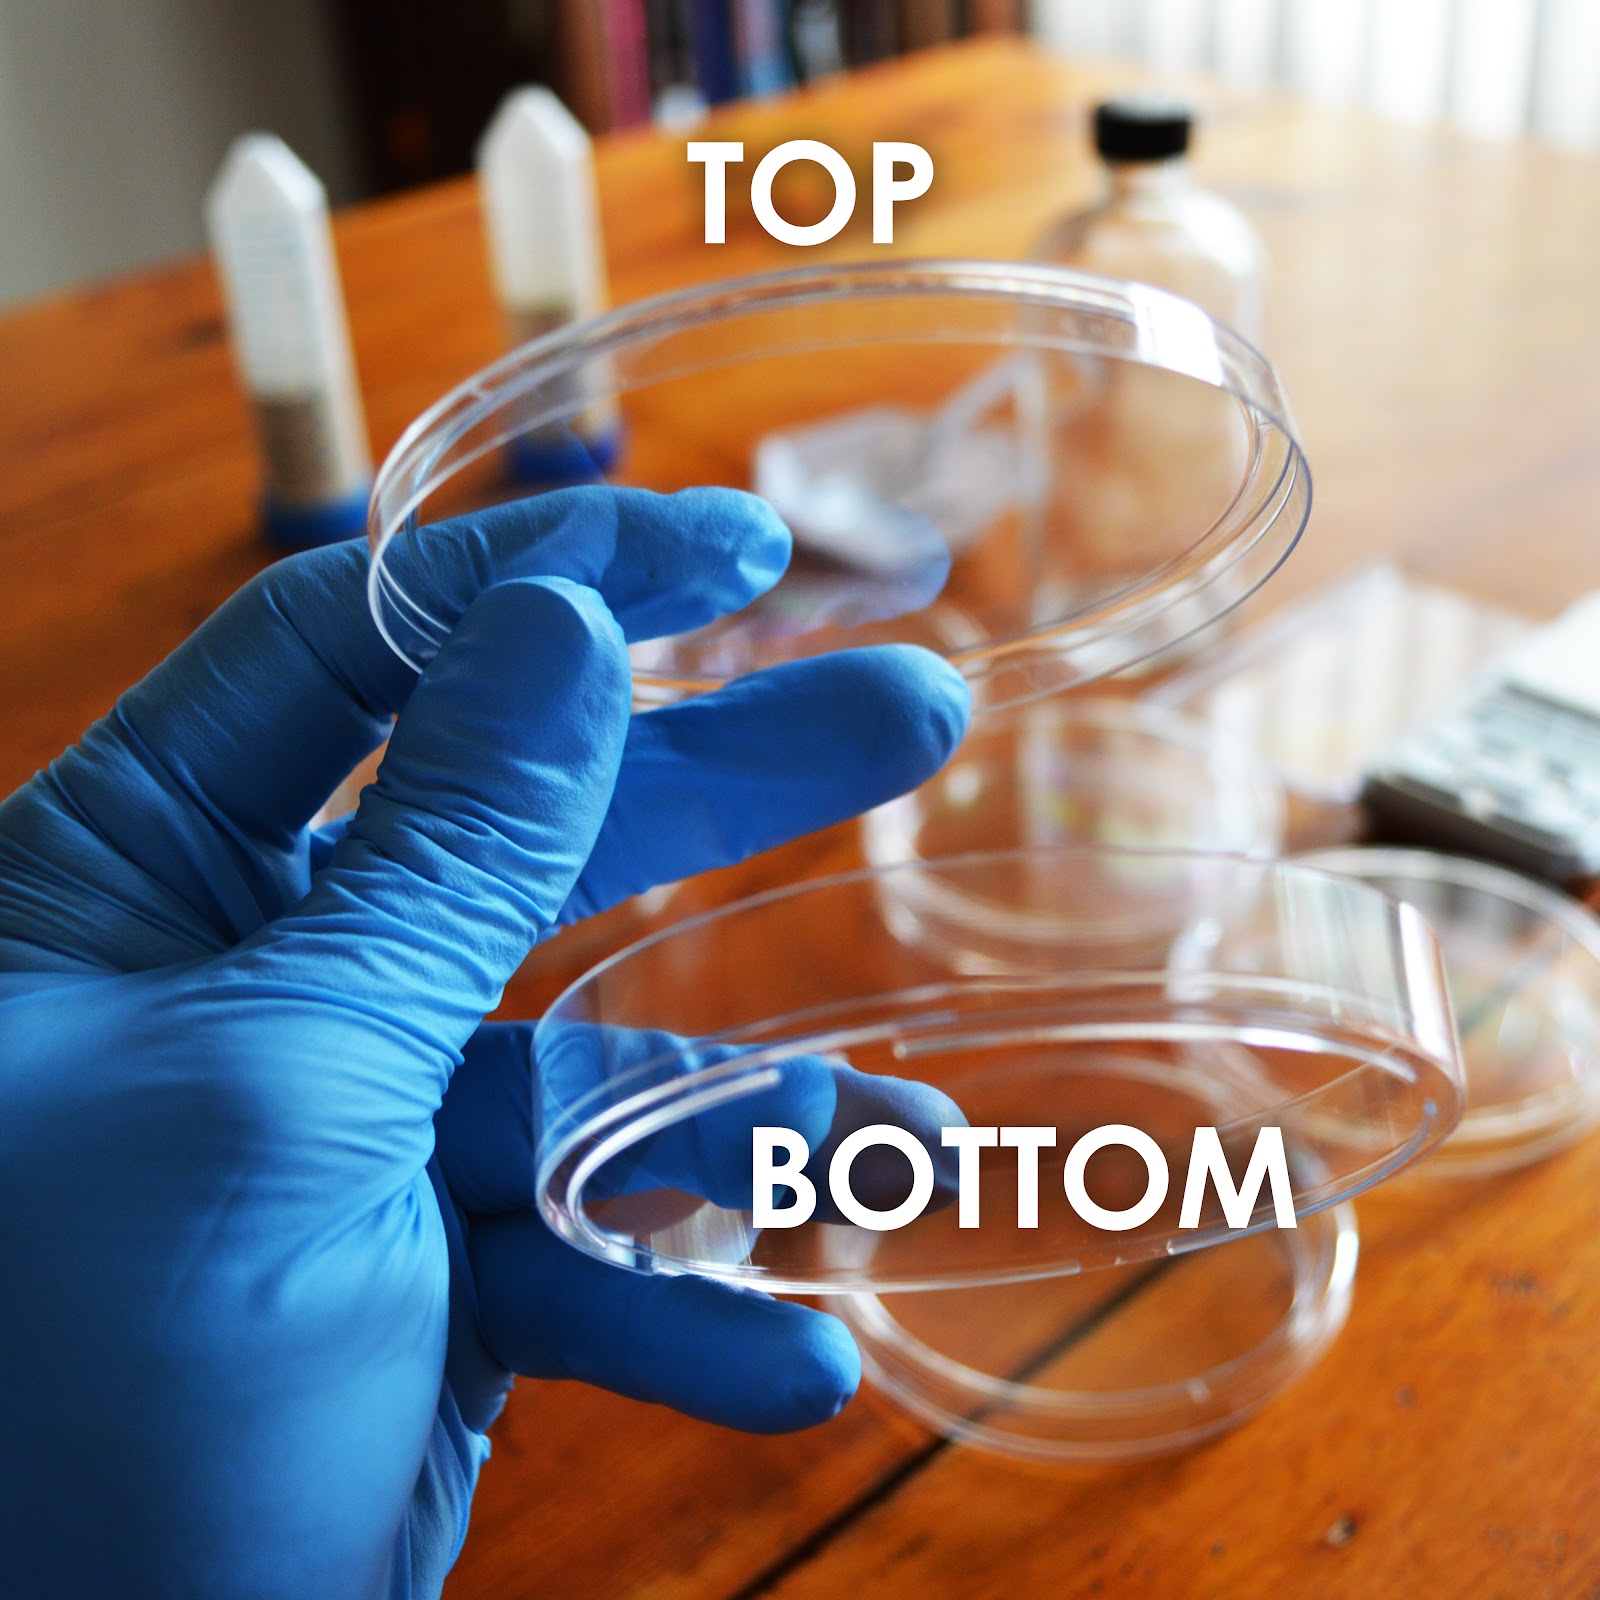
The top part of the full plate has the larger diameter.

-
First you will prepare the solid media to for your yeast to grow on. Make sure to label the bottom dish with the type of media, as the media look the same once prepared. Find the tube labeled “YPD Agar Media.”Take a tube labelled Agar media, such as “YPD Agar Media” or similar Dump its contents into the 250mL glass bottle. (You will need to make plates out of each kind of media, so start with whichever tube of media you choose.)
-
Using the 50mL conical tube labelled “For Measuring Liquid”, measure and add 150mL of water to the glass bottle.
-
Making agar is like making jello-- heat the agar to dissolve it, then it will solidify when it cools. Heat the bottle in the microwave for 30 seconds at a time, being careful not to let the bottle boil over. DO NOT SCREW THE LID DOWN TIGHT! (just place it on top and give it a slight turn)
-
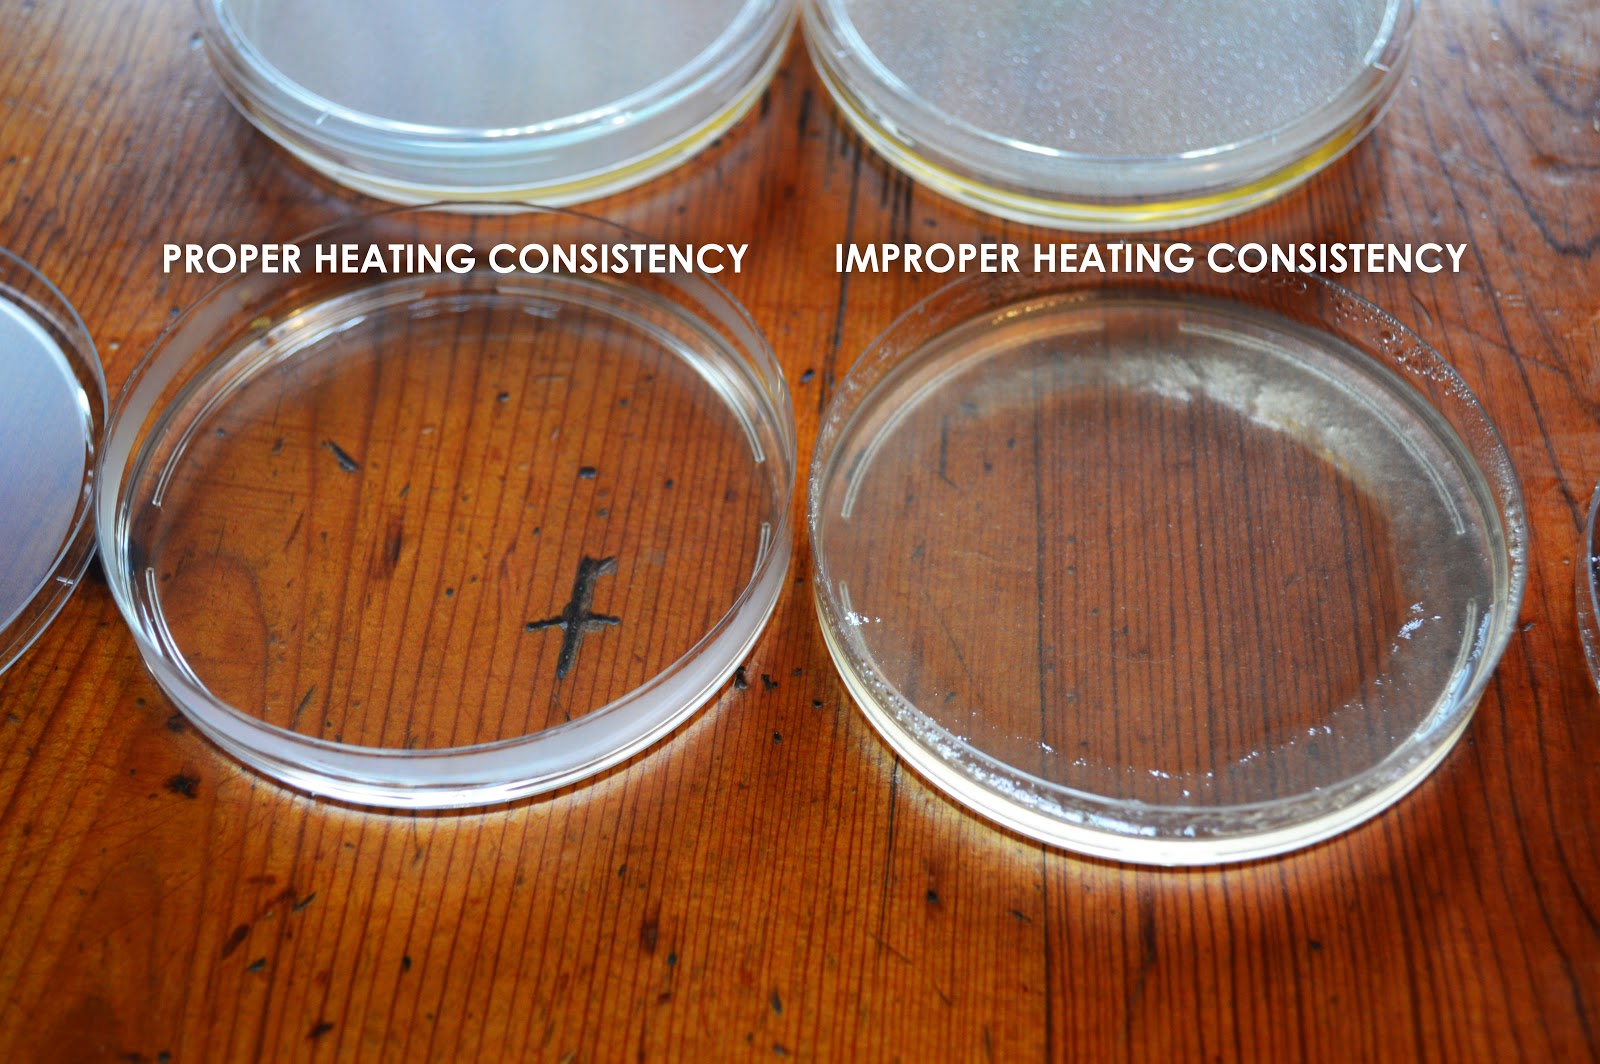
You will know it’s done when the liquid looks yellowish and fully see-through (no fogginess, graininess or crystals). This should take about 2 -3 minutes total of microwaving. Take the bottle out(caution contents hot) and let it cool until you are able to touch it without much discomfort. This will take ~30 minutes.
-
While the bottle remains somewhat warm, pour the plates. One at a time, remove the lid of 7 plates and pour just enough of the LB agar from the bottle to cover the bottom half of the plate. Put the lid back on.
-
Let cool for at least one 1 hour before use(you can cool faster by putting them in the fridge but don’t freeze). If possible let the plates sit out for a couple hours or overnight to let the condensation evaporate. Then store in your fridge at 4ºC upside down so any condensation doesn’t drip on the plates. Plates will store for 1-2 months.

Making Competent Yeast Cells for Transformation
‘Competent’ means the yeast are able to take in foreign DNA. The cell walls normally prevent things from entering in, but we are going to mix the yeast with chemicals and salts that change this. In order to get GFP DNA to work inside the yeast cells we need to get all of the components inside the cells! This process is called transformation. We put all the materials into synthetic DNA and then trick the Yeast into thinking that our DNA is its own DNA and so they make Green Fluorescent Protein..
The yeast transformation mix contains:
40% Polyethylene Glycol(PEG) 8000
PEG is thought to play a number of roles in transformation: from shielding the charged DNA, to helping it get into the cell, to making the cell membrane more porous.
100mM Lithium Acetate(LiAc)
LiAc is thought to shield and neutralize the negative charge of DNA to make it more likely to enter into the cell.
Single Stranded (SS) Carrier DNA
SS Carrier DNA is known to help DNA enter into yeast during the transformation process. It is thought to prevent nucleases from digesting the plasmid and also bind to the yeast cell membrane making it easier for the plasmid DNA to enter the cell.
-
Take one of the tubes of dried yeast, add water to the top and shake till it is all dissolved. If you are using your own dried yeast add a few grains to a tube with water and shake till dissolved.
-
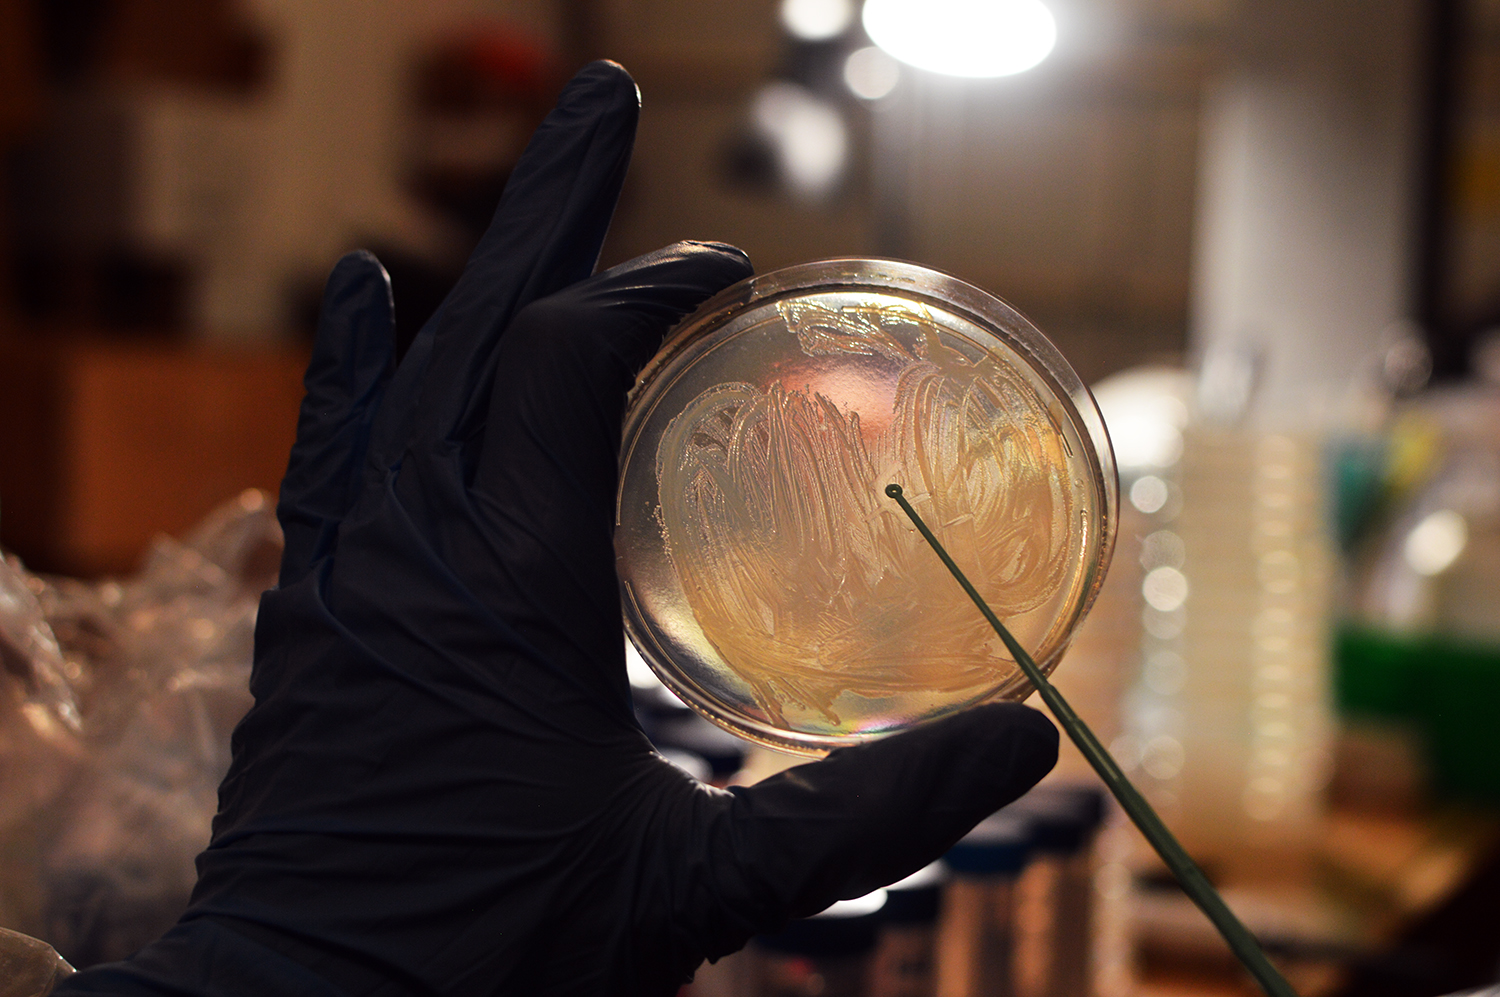
Next, using your pipette put 100uL of the yeast solution onto a new YPD agar plate you made and using an inoculation loop gently spread or “streak” the bacteria. Remember to always change pipette tips in between uses to keep from accidentally mixing stuff left over on the tip.
-
Let the plate grow overnight ~12-24 hours, or until you see white-ish yeast begin to grow. Make sure you are using the YPD agar plate, NOT the YPD G418 agar plate. See the following link for a walk-through of how to streak out yeast:https://goo.gl/GR8IOf
Next Day
-
Add 100 microliters(μL) of Yeast Transformation mix to a new microcentrifuge tube. If you have never used a pipette before you can find a guide here

-
Using an inoculation loop, gently scrape some yeast off of your fresh plate and mix it into the transformation mix. Be gentle! The agar is soft. Mix until any big clumps have disappeared. This might require gently pipetting the mixture up and down. Mix in enough yeast so that the liquid is no opaque(around 2 loop-fulls)
-
Make one tube for each genetic engineering experiment you plan to perform in the next day or two and store them at 4ºC (39ºF) in the fridge. Remember you don’t need to do it all at once.

-
Find the DNA tube labelled “Yeast GFP Expression Plasmid” and using your pipette add 10 microliters(μL) to your competent cell mixture. Because some of the liquid plasmid is very small it might be stuck to the sides and lid of the tube. Flick it with your wrist to settle the liquid to the bottom. Remember to change pipette tips between pipetting.
-
Incubate the tube for 1 hour in ~42ºC (108ºF) water. You can approximate this temperature by using water that is warm, but comfortable enough such that you can still keep your hand in it.
-
Add 1.5 milliliters (mL)(fill up to the top) of room temperature water to one of the YPD media microcentrifuge tubes and shake to dissolve the YPD.
-
Using the pipette, add 900μL of YPD media to your competent cell mixture containing your DNA.
-
Incubate the tube at 30ºC(86ºF) for 4-6 hours or overnight hours at room temperature. This step allows to yeast to recover and replicate the DNA. If you want to incubate longer it can help improve the efficiency of the transformation and make it work better.
After Incubation
-
Take a YPD G418 plate out of the fridge and let it warm up to room temperature. Using the pipette, add 400μL of your transformation mixture on top of an YPD G418 Agar plate.
-
Using an inoculation loop or plate spreader gently spread the yeast around the plate and let dry for 10 minutes before putting the lid back on.
-
Flip the plate upside down to prevent condensation from forming and dripping onto your yeast.
-
Incubate the plate at 30ºC (86ºF) for 1-3 days or room temperature for 2-4 days or until you start to see yeast growing as little white dots.
-
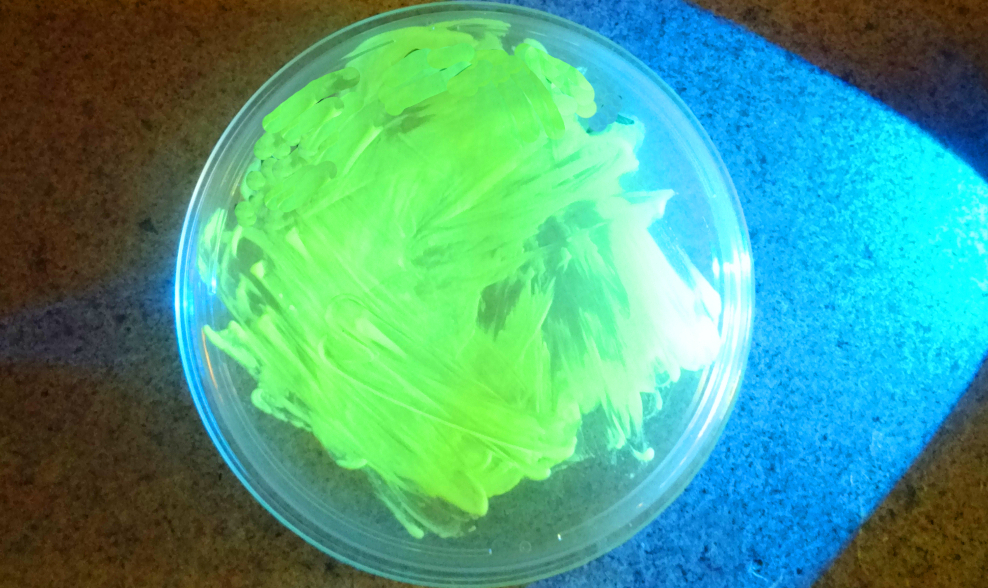
Put on your special yellow glasses and shine the blue light on the plate. If the yeast were engineered properly they should glow green!
-
If your experiment didn’t work, give it another shot, Science doesn’t always work on the first try. Also, feel free to contact us at odin@the-odin.com and we will help you troubleshoot.
Successful experiment example...
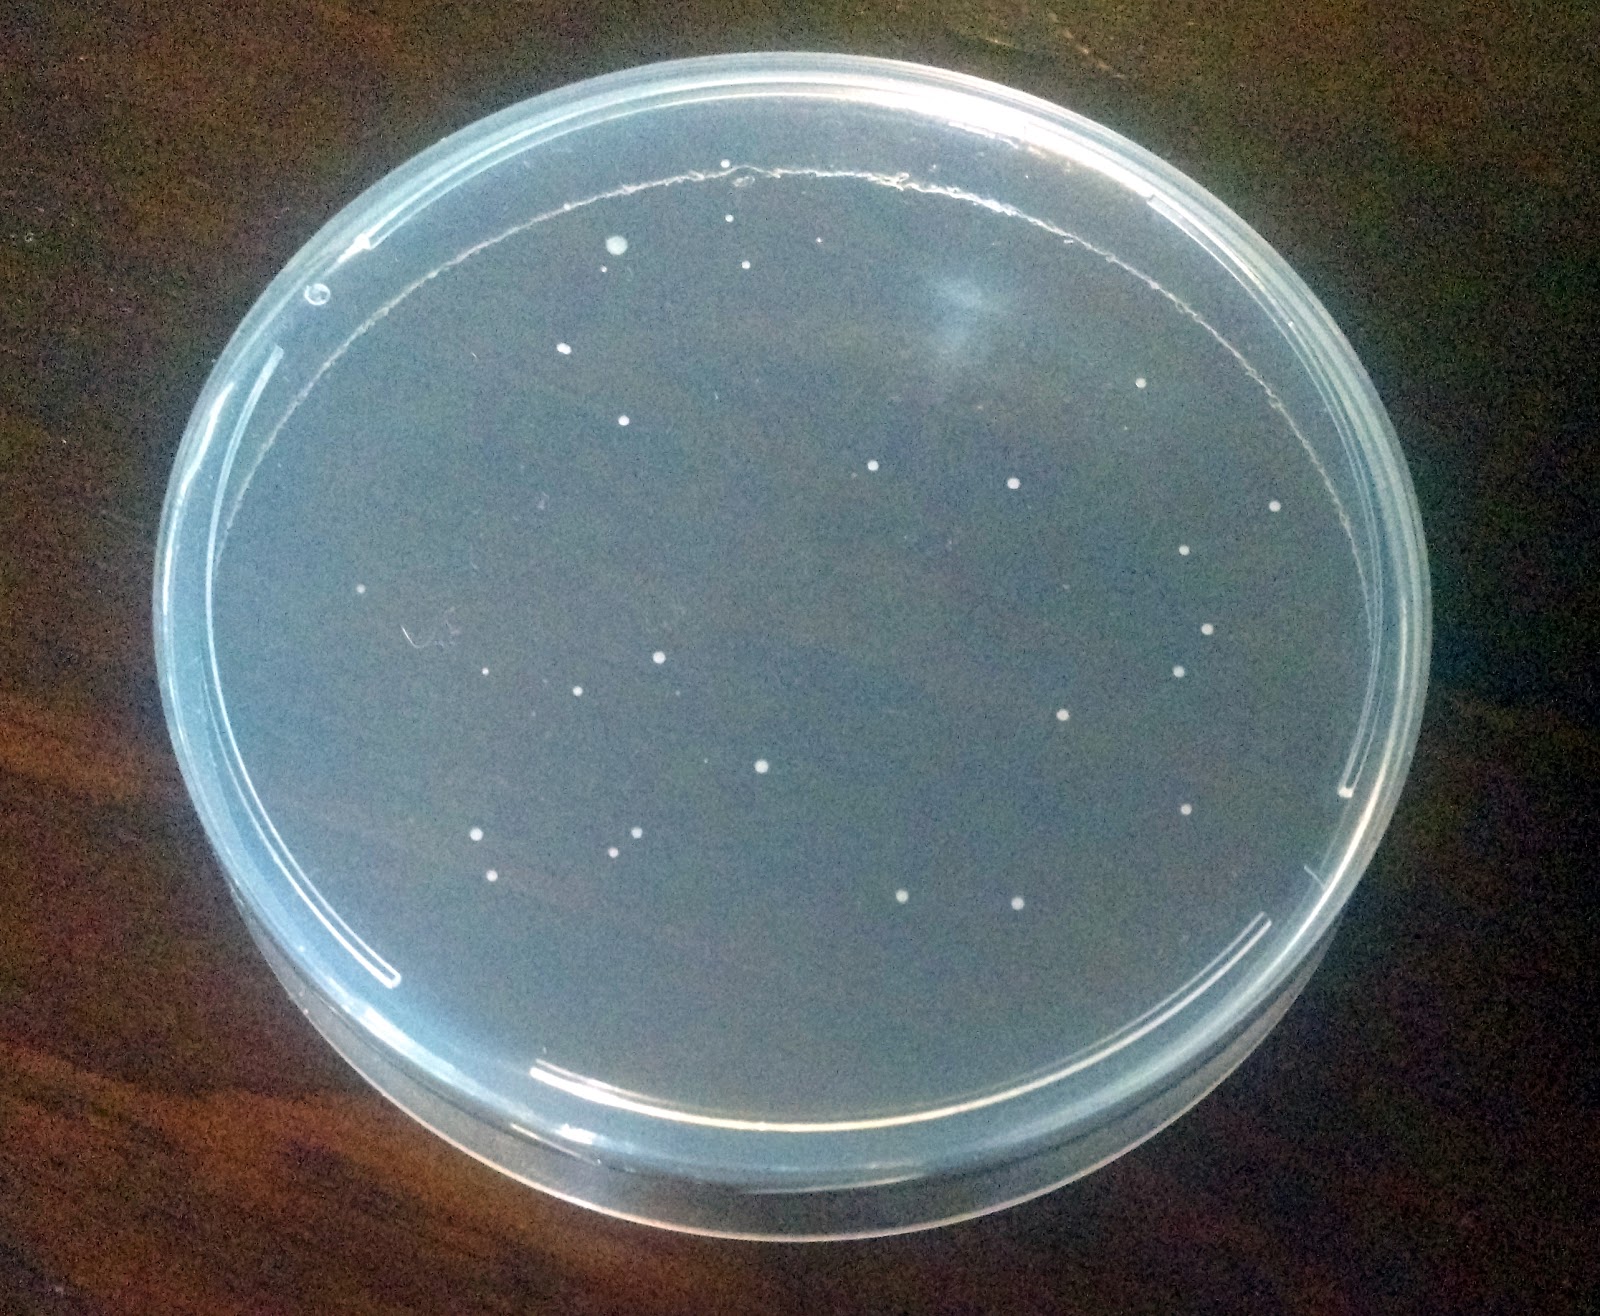
Without Glasses and Blue Light

With Glasses and Blue Light
In a successful experiment you should see yeast growing on the plate as seen in the picture. By shining the blue LED light on these colonies, while wearing your cool yellow shades, the yeast will be bright fluorescent green! These are yeast colonies that were successfully took up the DNA and so they survived and replicate to form what Scientists call colonies, or small groups of yeast.
Try our other kits:
DIY Bacterial Gene Engineering CRISPR Kit
https://www.the-odin.com/diy-crispr-kit
Genetic Engineering Home Lab Kit
https://www.the-odin.com/genetic-engineering-home-lab-kit
